We've Launched a New Documentation Website (Beta Launch)
The documentation for DuitNow is now available on our newly launched documentation platform. This is an initial beta rollout of our new documentation site, designed to become the long-term home for all documentation moving forward.
You'll find the familiar content you're used to—now hosted on a new platform that will progressively receive updates and enhancements.
We encourage you to start accessing DuitNow materials there to explore the new experience and ensure you're viewing the latest documentation updates. If you have any feedback, please reach out to us.
Visit the New Documentation WebsiteMerchant Onboarding Process
After we have reviewed and approved your go live information, you can start to register the merchants that will be activated in Production environment.
Step 1: In the Go live section, click the Register or Add More Merchant button, and you will be navigated to the Merchant Registration page.
In the Merchant Registration page, you can register merchants and view registered merchants information.
For merchant registration, you must first identify the merchant’s registration status in PayNet RPP system.
| Merchant Registration Status in RPP | Description | Registration for DuitNow Pay |
|---|---|---|
| New merchant | The merchant you are about to register is new to the PayNet RPP ecosystem. | The merchant will have a new profile created in the PayNet RPP ecosystem, and will have DuitNow Pay as a payment option when you activate this product implementation in Production. |
| Existing merchant | The merchant already exist in PayNet RPP ecosystem, possibly from previous integration done for DuitNow Online Banking/Wallets (DOBW) project. | The merchant will retain its current (existing) profile information, with a new Product ID tagged to it, specifically for DuitNow Pay. |
Step 2.1a: For New merchant registration, you can start by clicking the Download Template A button. This file template has columns dedicated for you to input new merchant information.
Step 2.1b: For Existing merchant registration, you can start by clicking the Download Template B button. This file template has columns dedicated for you to input product-specific information for your merchant.
Once you have downloaded the template file, you can populate the merchant information accordingly.
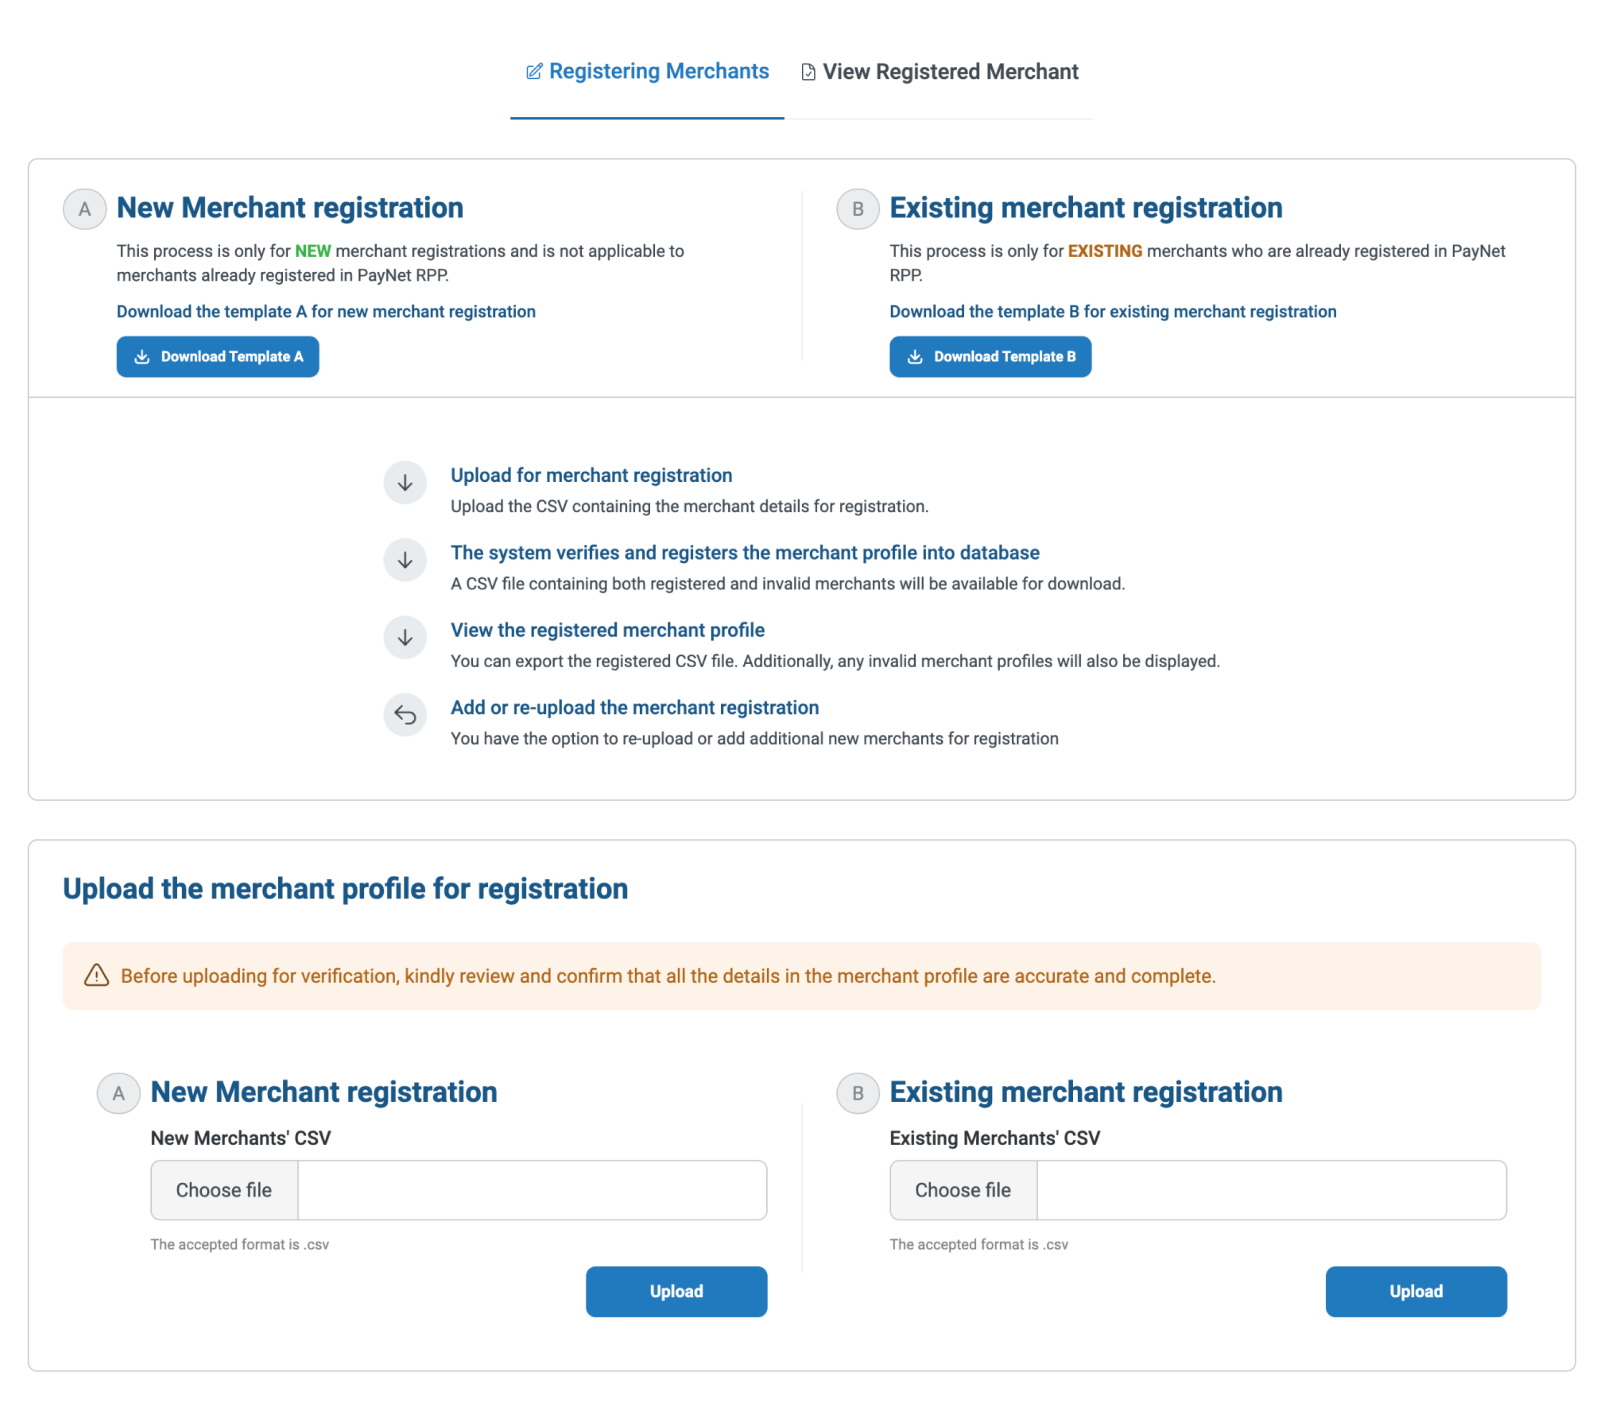
Step 2.2a: For New merchant registration, you can upload the file that you have populated into the dedicated column for A New merchant registration.
Step 2.2b: For Existing merchant registration, you can upload the file that you have populated into the dedicated column for B Existing merchant registration.
To upload a file, click Choose file and select the file of your choice. Click the Upload button to initiate the process of registering the merchants from your file to the DuitNow Pay system accordingly.
Note: Only one file can be uploaded at a time. If you have multiple files, you initiate the upload process repeatedly.
Step 2.3: After you have uploaded the file, our system will begin to process the file and register the merchants onto our system accordingly. To view the merchant info and the registration status, click on the View Registered Merchant tab within the page.
Step 2.4: You can use the filter function to display the list of merchants that fit the selection criteria. You may filter by Registration Status, Registration Type and registration period. Once you have selected the filter criteria, the list will be refreshed and displayed accordingly.
Step 2.5a: To facilitate your operational tasks, you can extract the list of registered merchants by clicking the Export CSV button.

Step 2.5b: You can select the pre-defined criteria for us to filter out the records. Once you have selected the required criteria, click the Export button. Our system will generate the file accordingly, and will send a download link for the file to the email address of your choice.

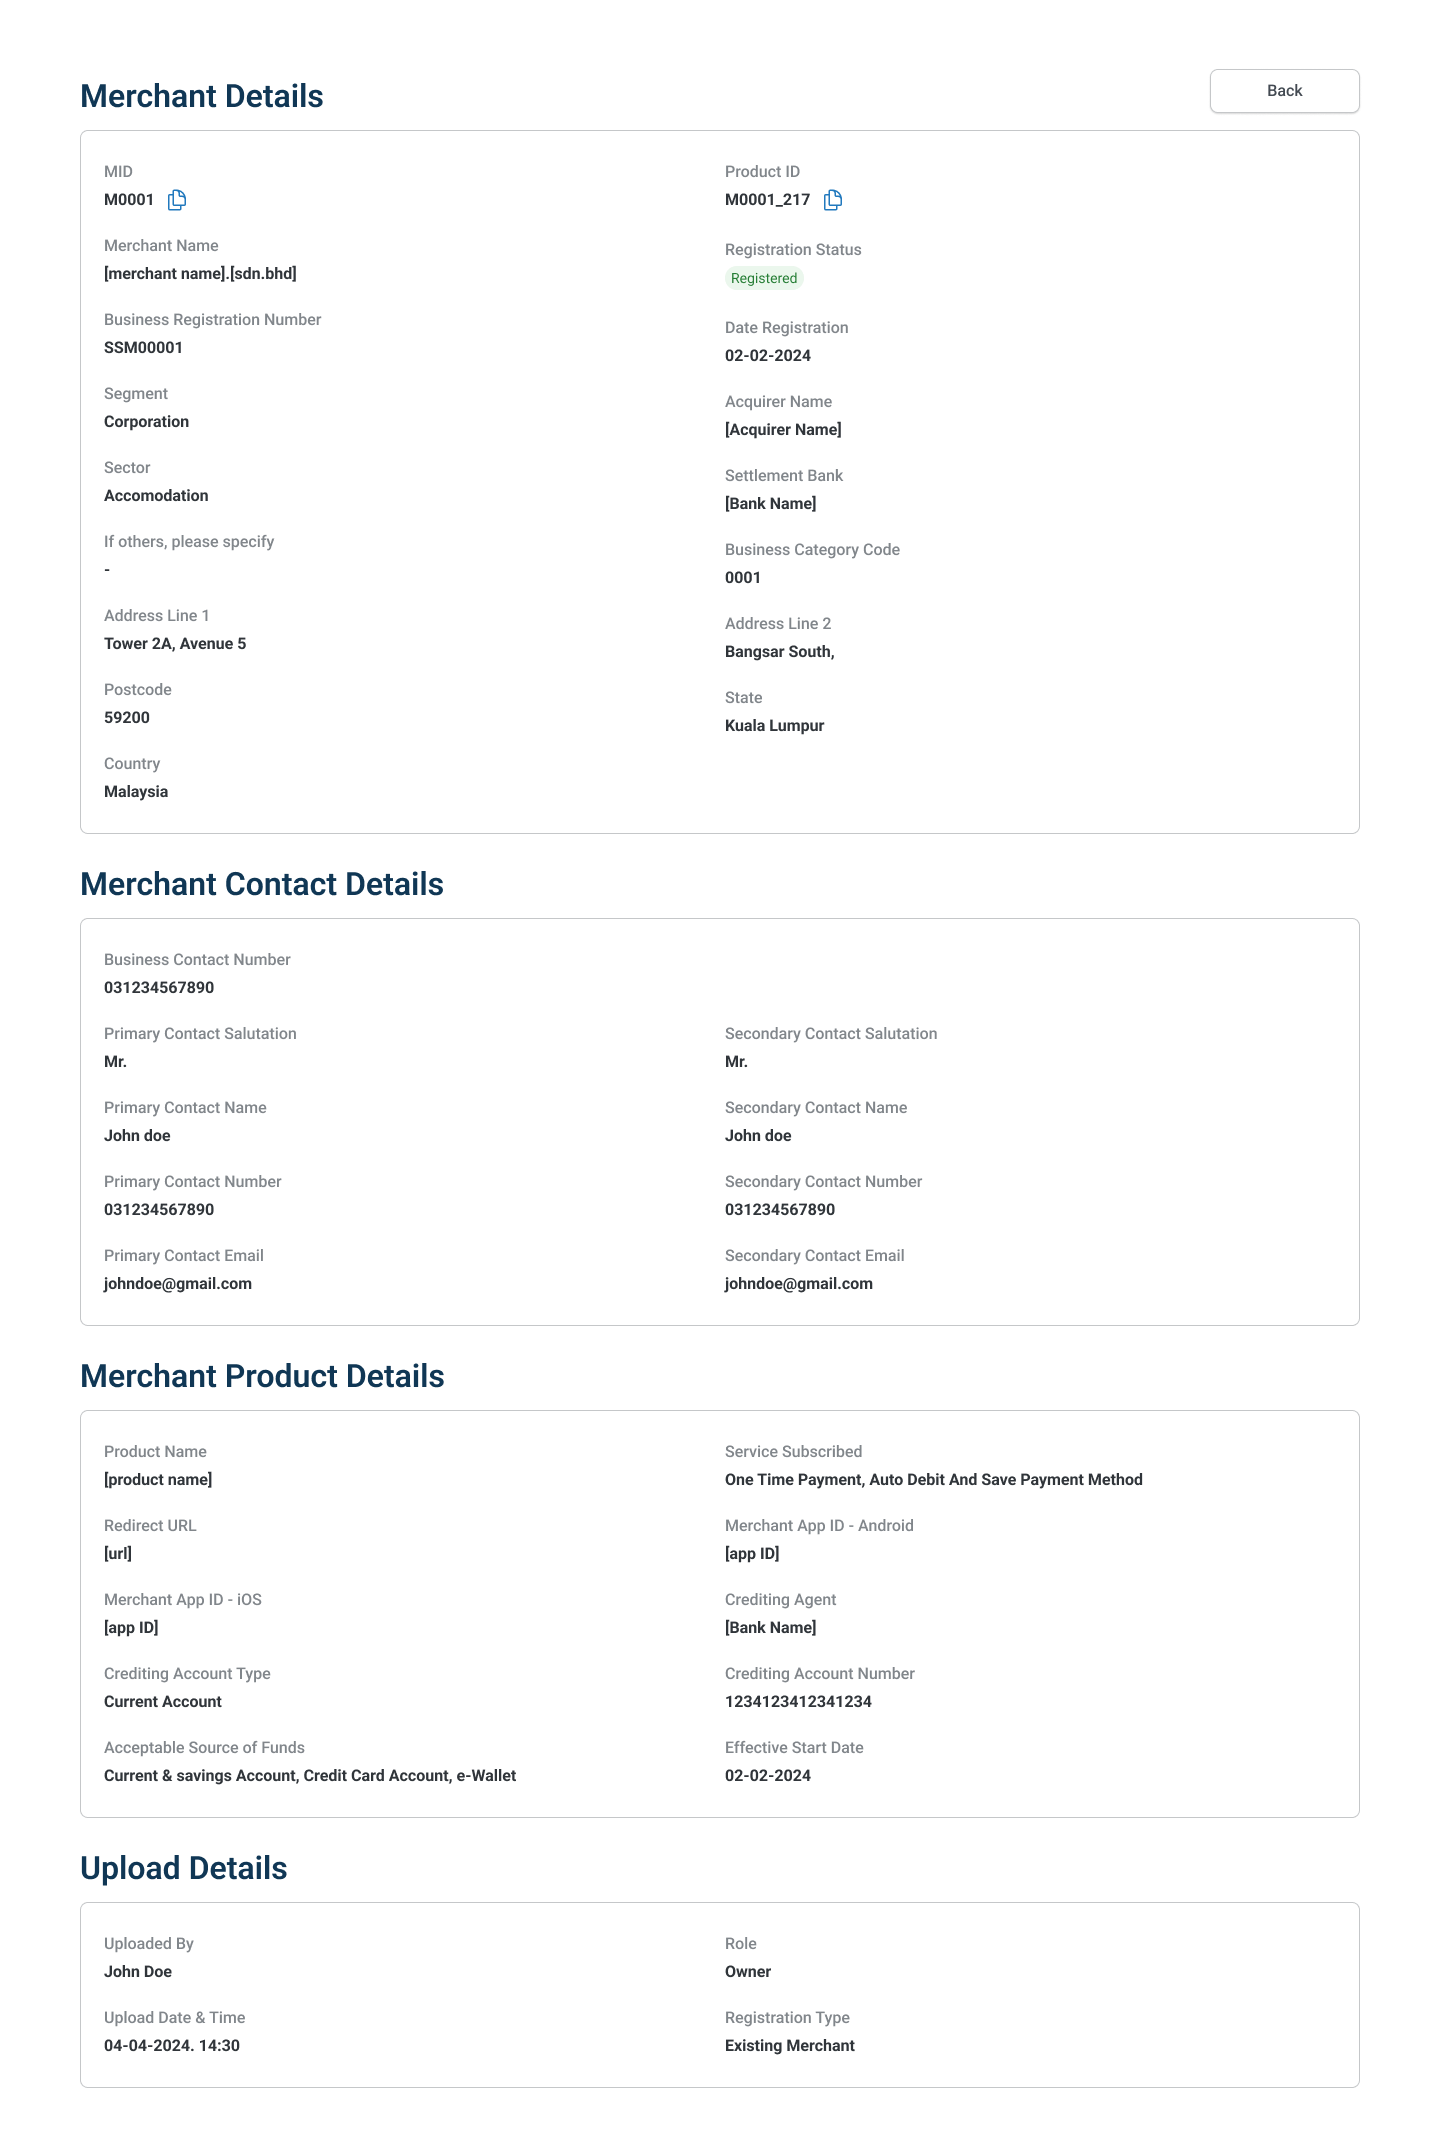
Step 2.6: To view the details of a specific merchant, click on the More button on the merchant listing. A page with the complete detail of the merchant will be displayed.
To edit merchant information, please access our RPP Back Office portal.