We've Launched a New Documentation Website (Beta Launch)
The documentation for DuitNow is now available on our newly launched documentation platform. This is an initial beta rollout of our new documentation site, designed to become the long-term home for all documentation moving forward.
You'll find the familiar content you're used to—now hosted on a new platform that will progressively receive updates and enhancements.
We encourage you to start accessing DuitNow materials there to explore the new experience and ensure you're viewing the latest documentation updates. If you have any feedback, please reach out to us.
Visit the New Documentation WebsiteNextSwitch Report Testing
Overview
Report Testing is a key component of the SAN NextSwitch Migration Self-Certification, ensuring that participating institutions can successfully retrieve, generate, and validate reports from the new switch environment.
This step verifies not only the availability of reporting capabilities, but also the accuracy and reliability of report data, which is critical for reconciliation, monitoring, and operational readiness during migration.
Learn how to retrieve the report via Developer Portal using the API access (via bash script) and the portal's UI
SAN Reports test cases are acknowledgement-based, requiring participants to verify that reports are generated correctly and contain accurate data.
Participants can retrieve reports via:
- API Access
- Developer Portal's UI
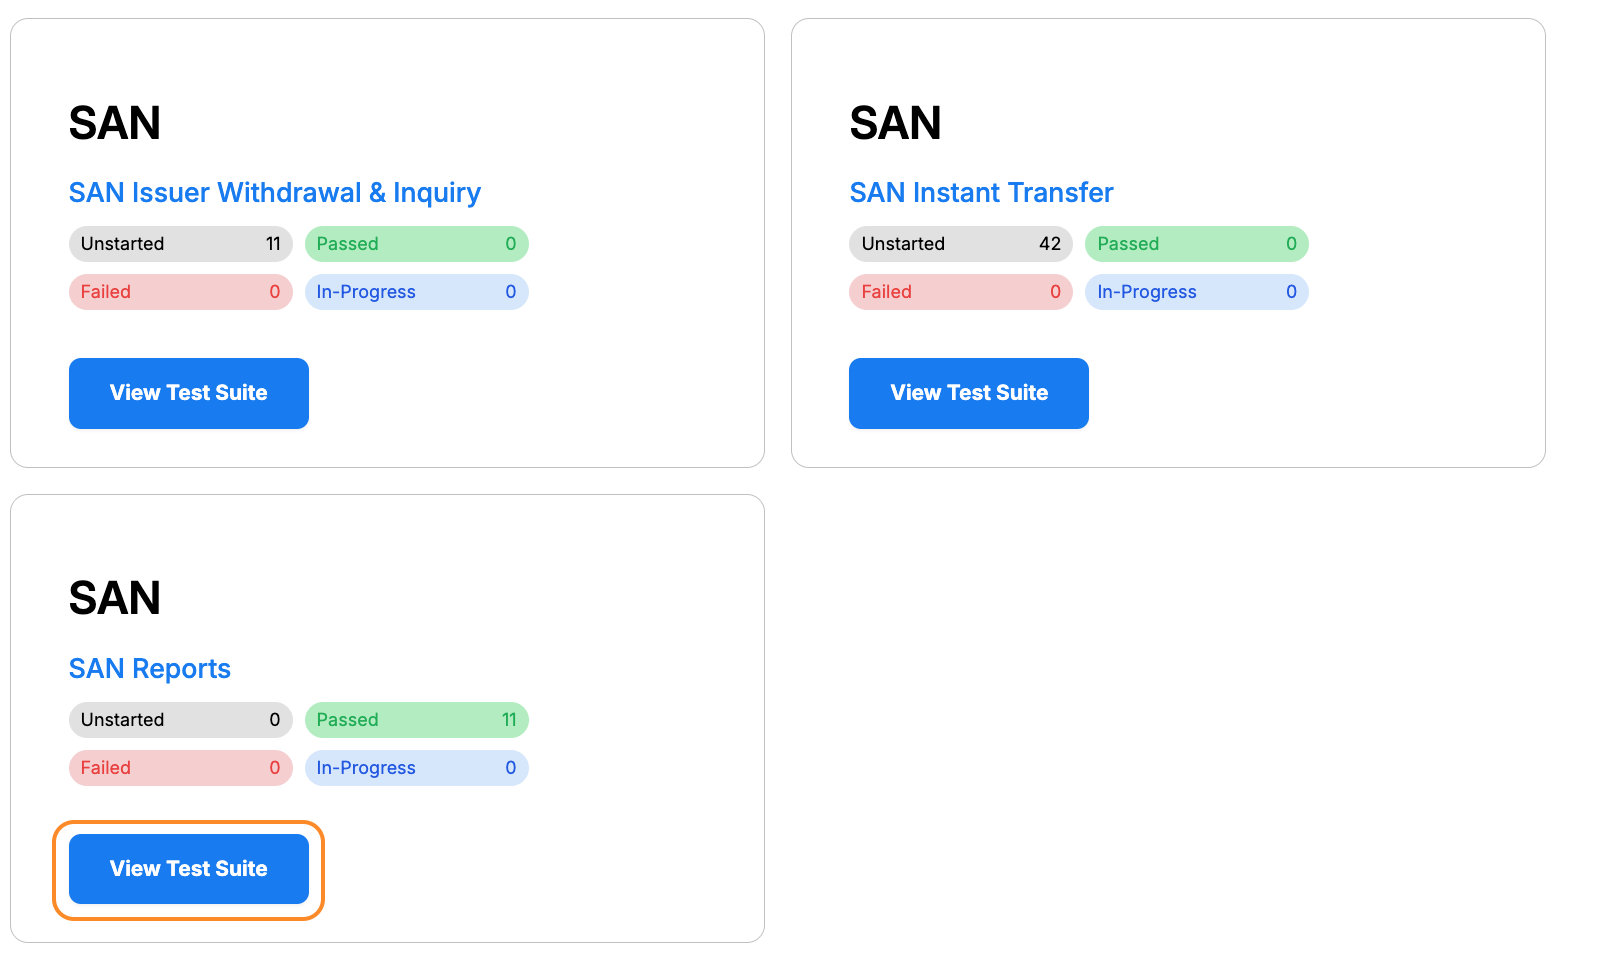
Step 1: Access SAN report test suite
- Navigate to SAN Reports test suite in your project
- Click “View Test Suite”
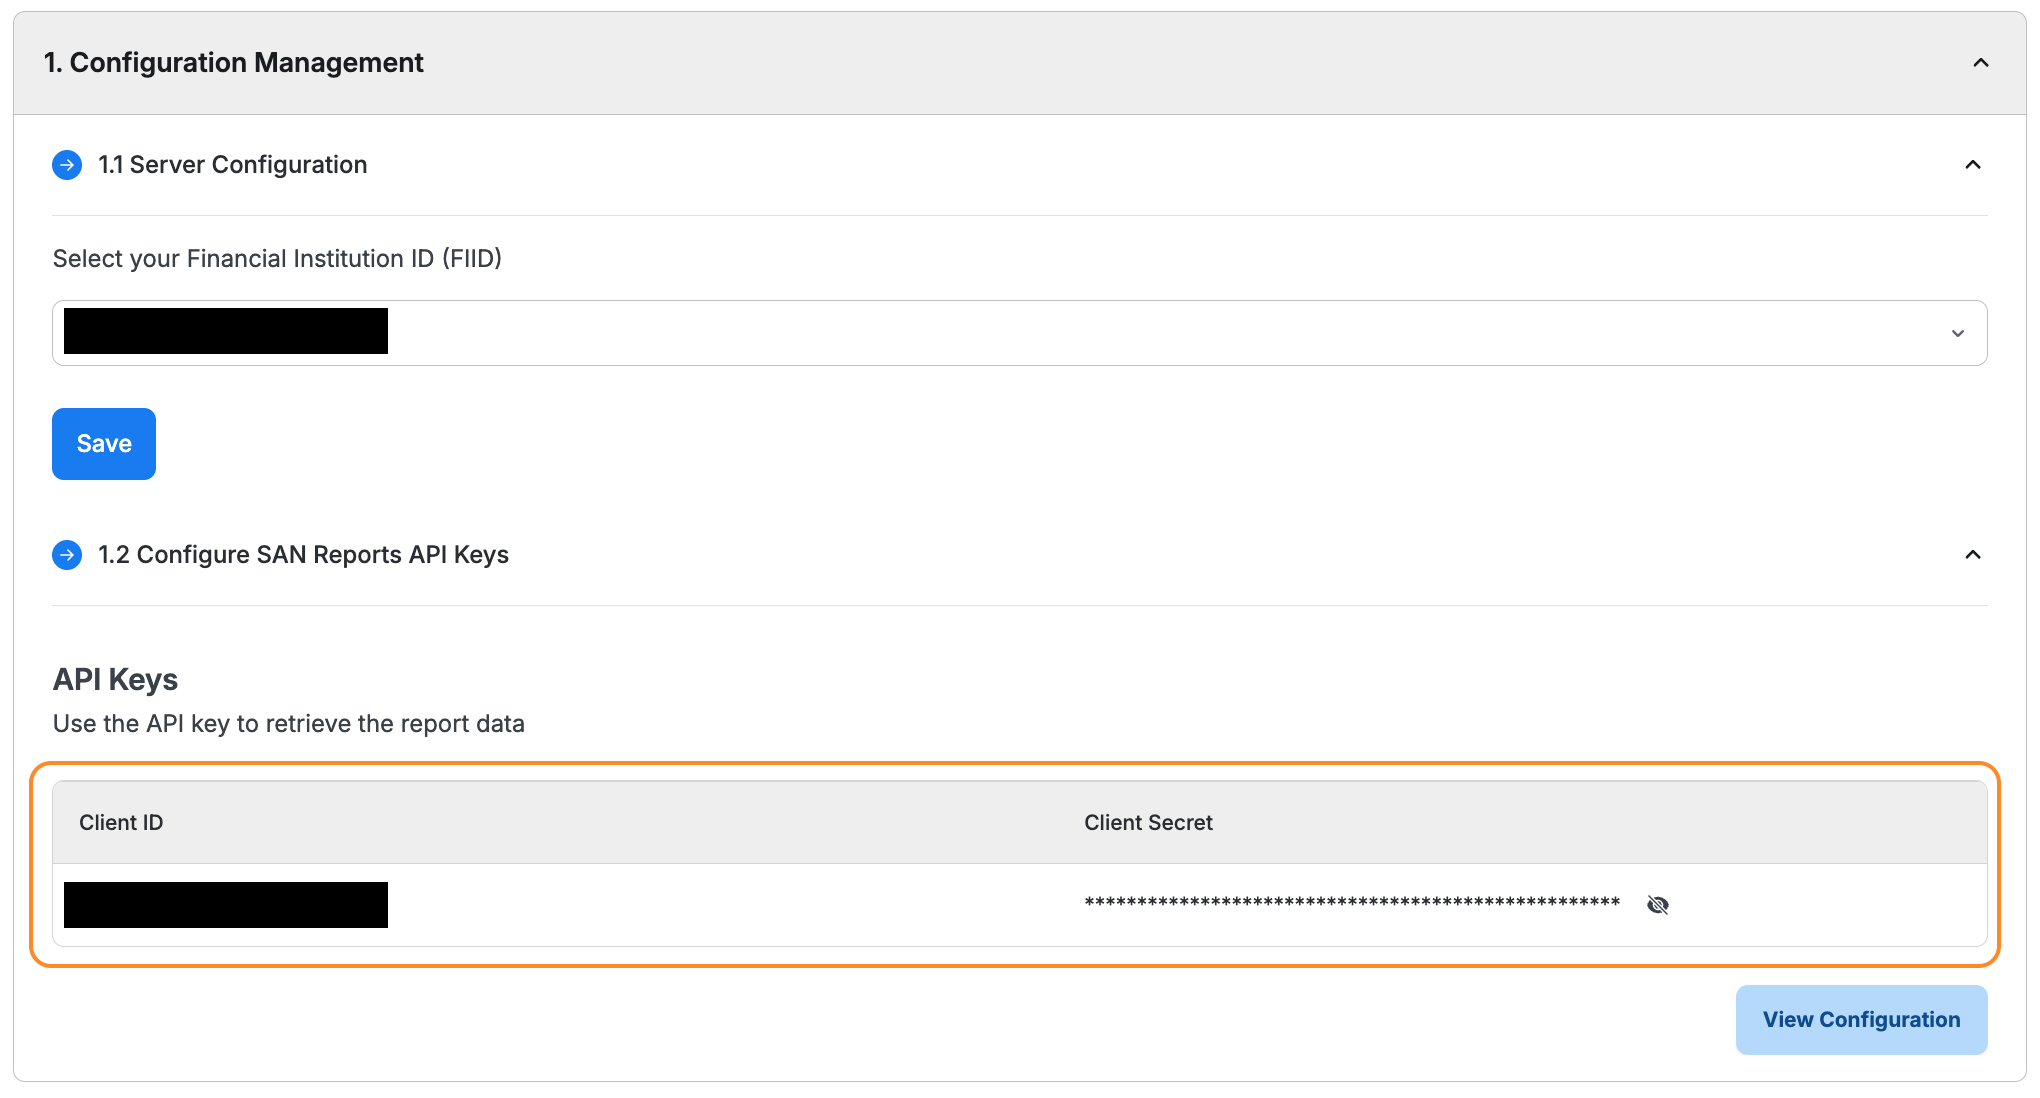
Step 2: Configure SAN report test suite
2.1 Configure FIID
- Scroll to Configuration Management
- Locate Server Configuration
- Select your FIID (Financial Institution ID)
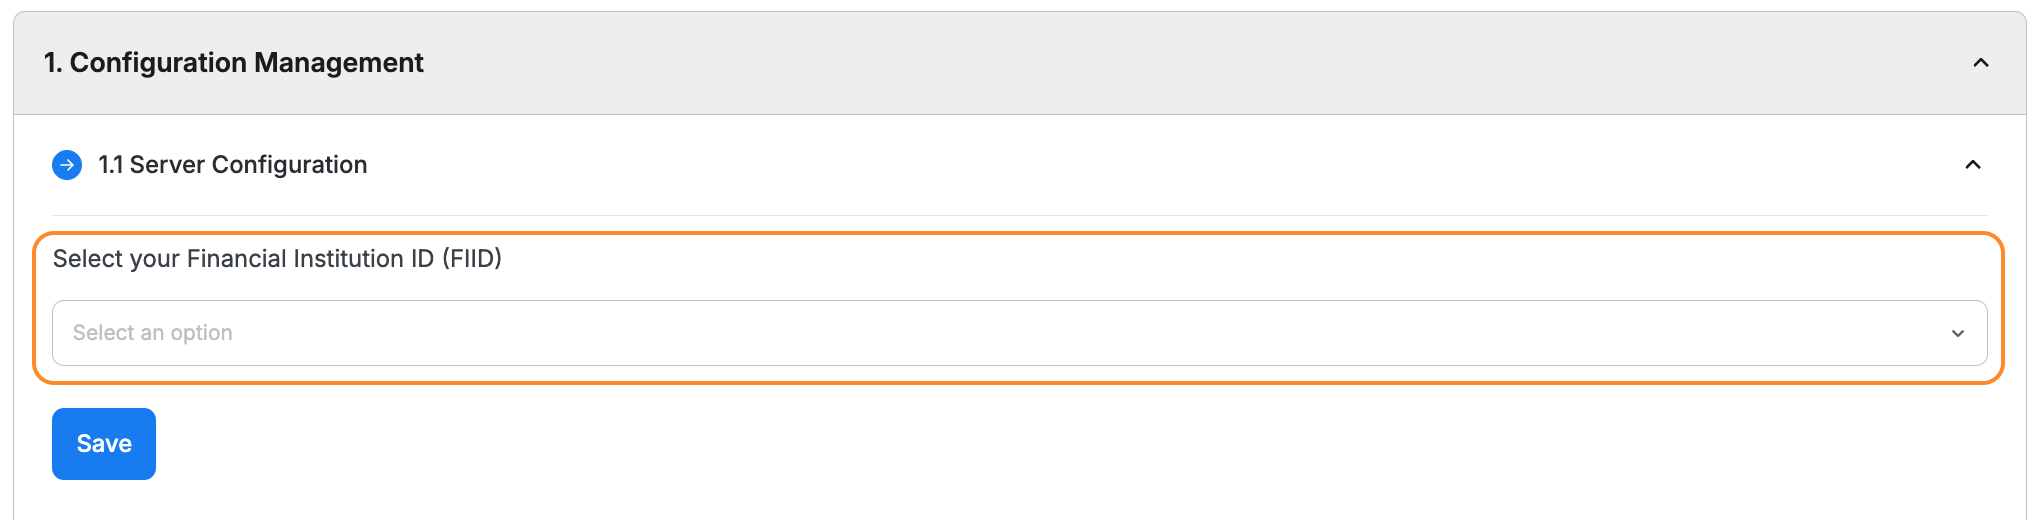
- Click “Save”
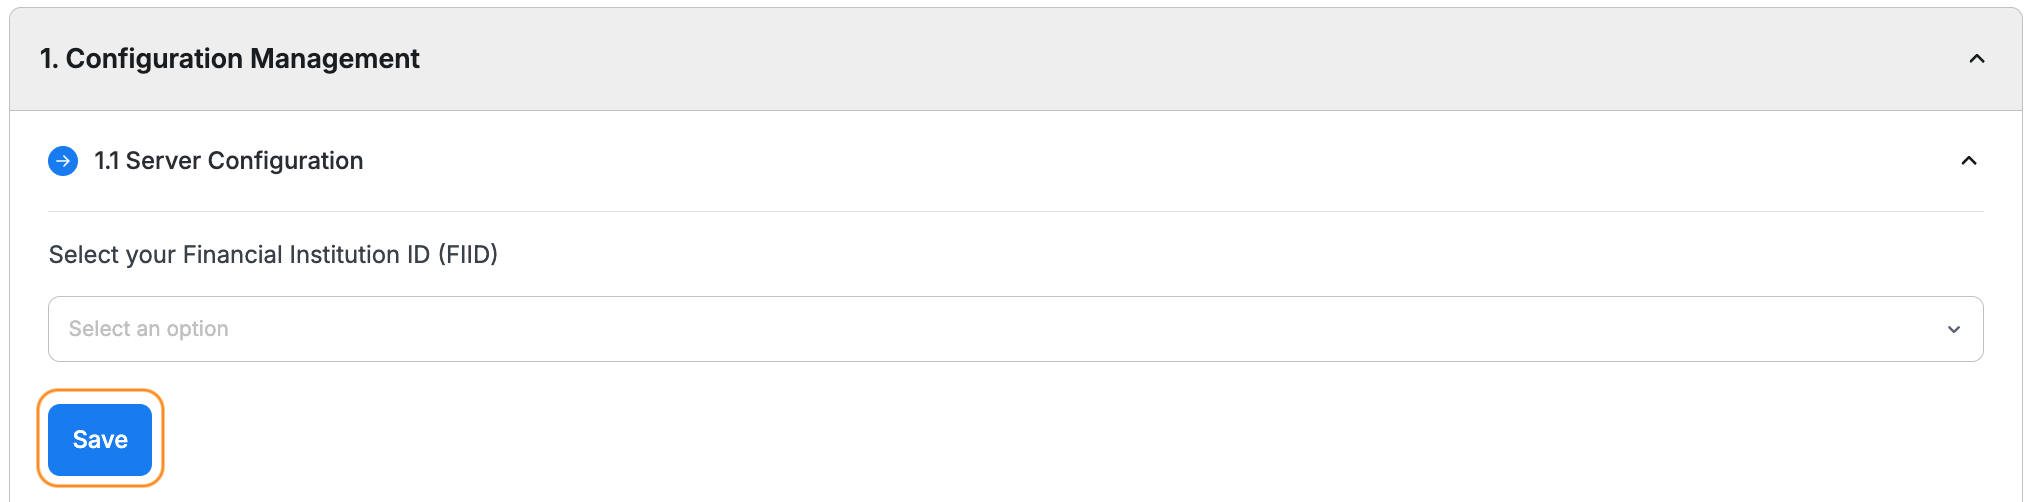
ℹ️ Ensure Server Configuration is saved before proceeding.
2.2 Configure SAN Reports API Keys
If you wish to retrieve the report via API access (bash script), you must configure the API key
- Go to Configure SAN Reports API Keys
- Click “View Configuration”
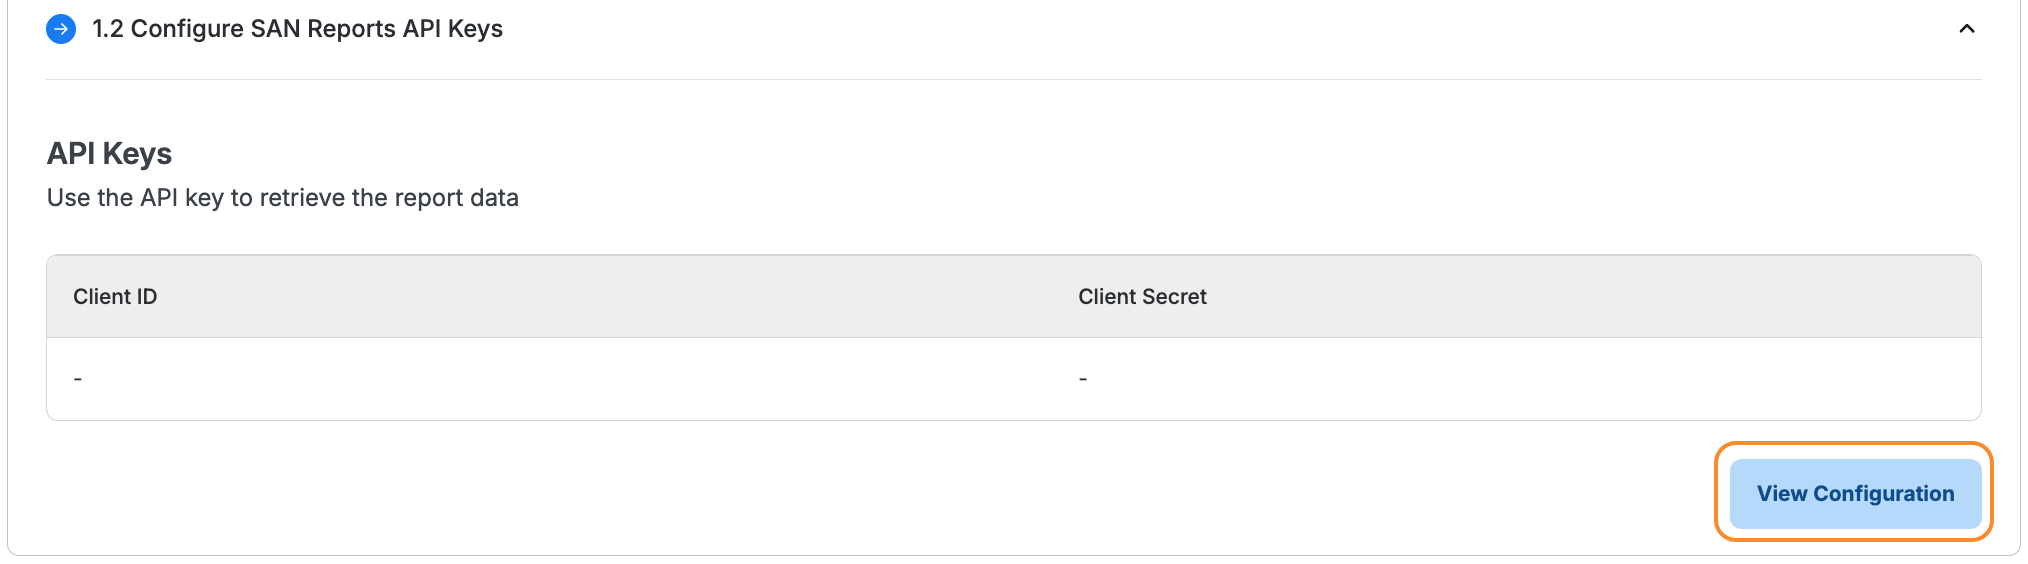
- You will be redirected to the Global Configuration page
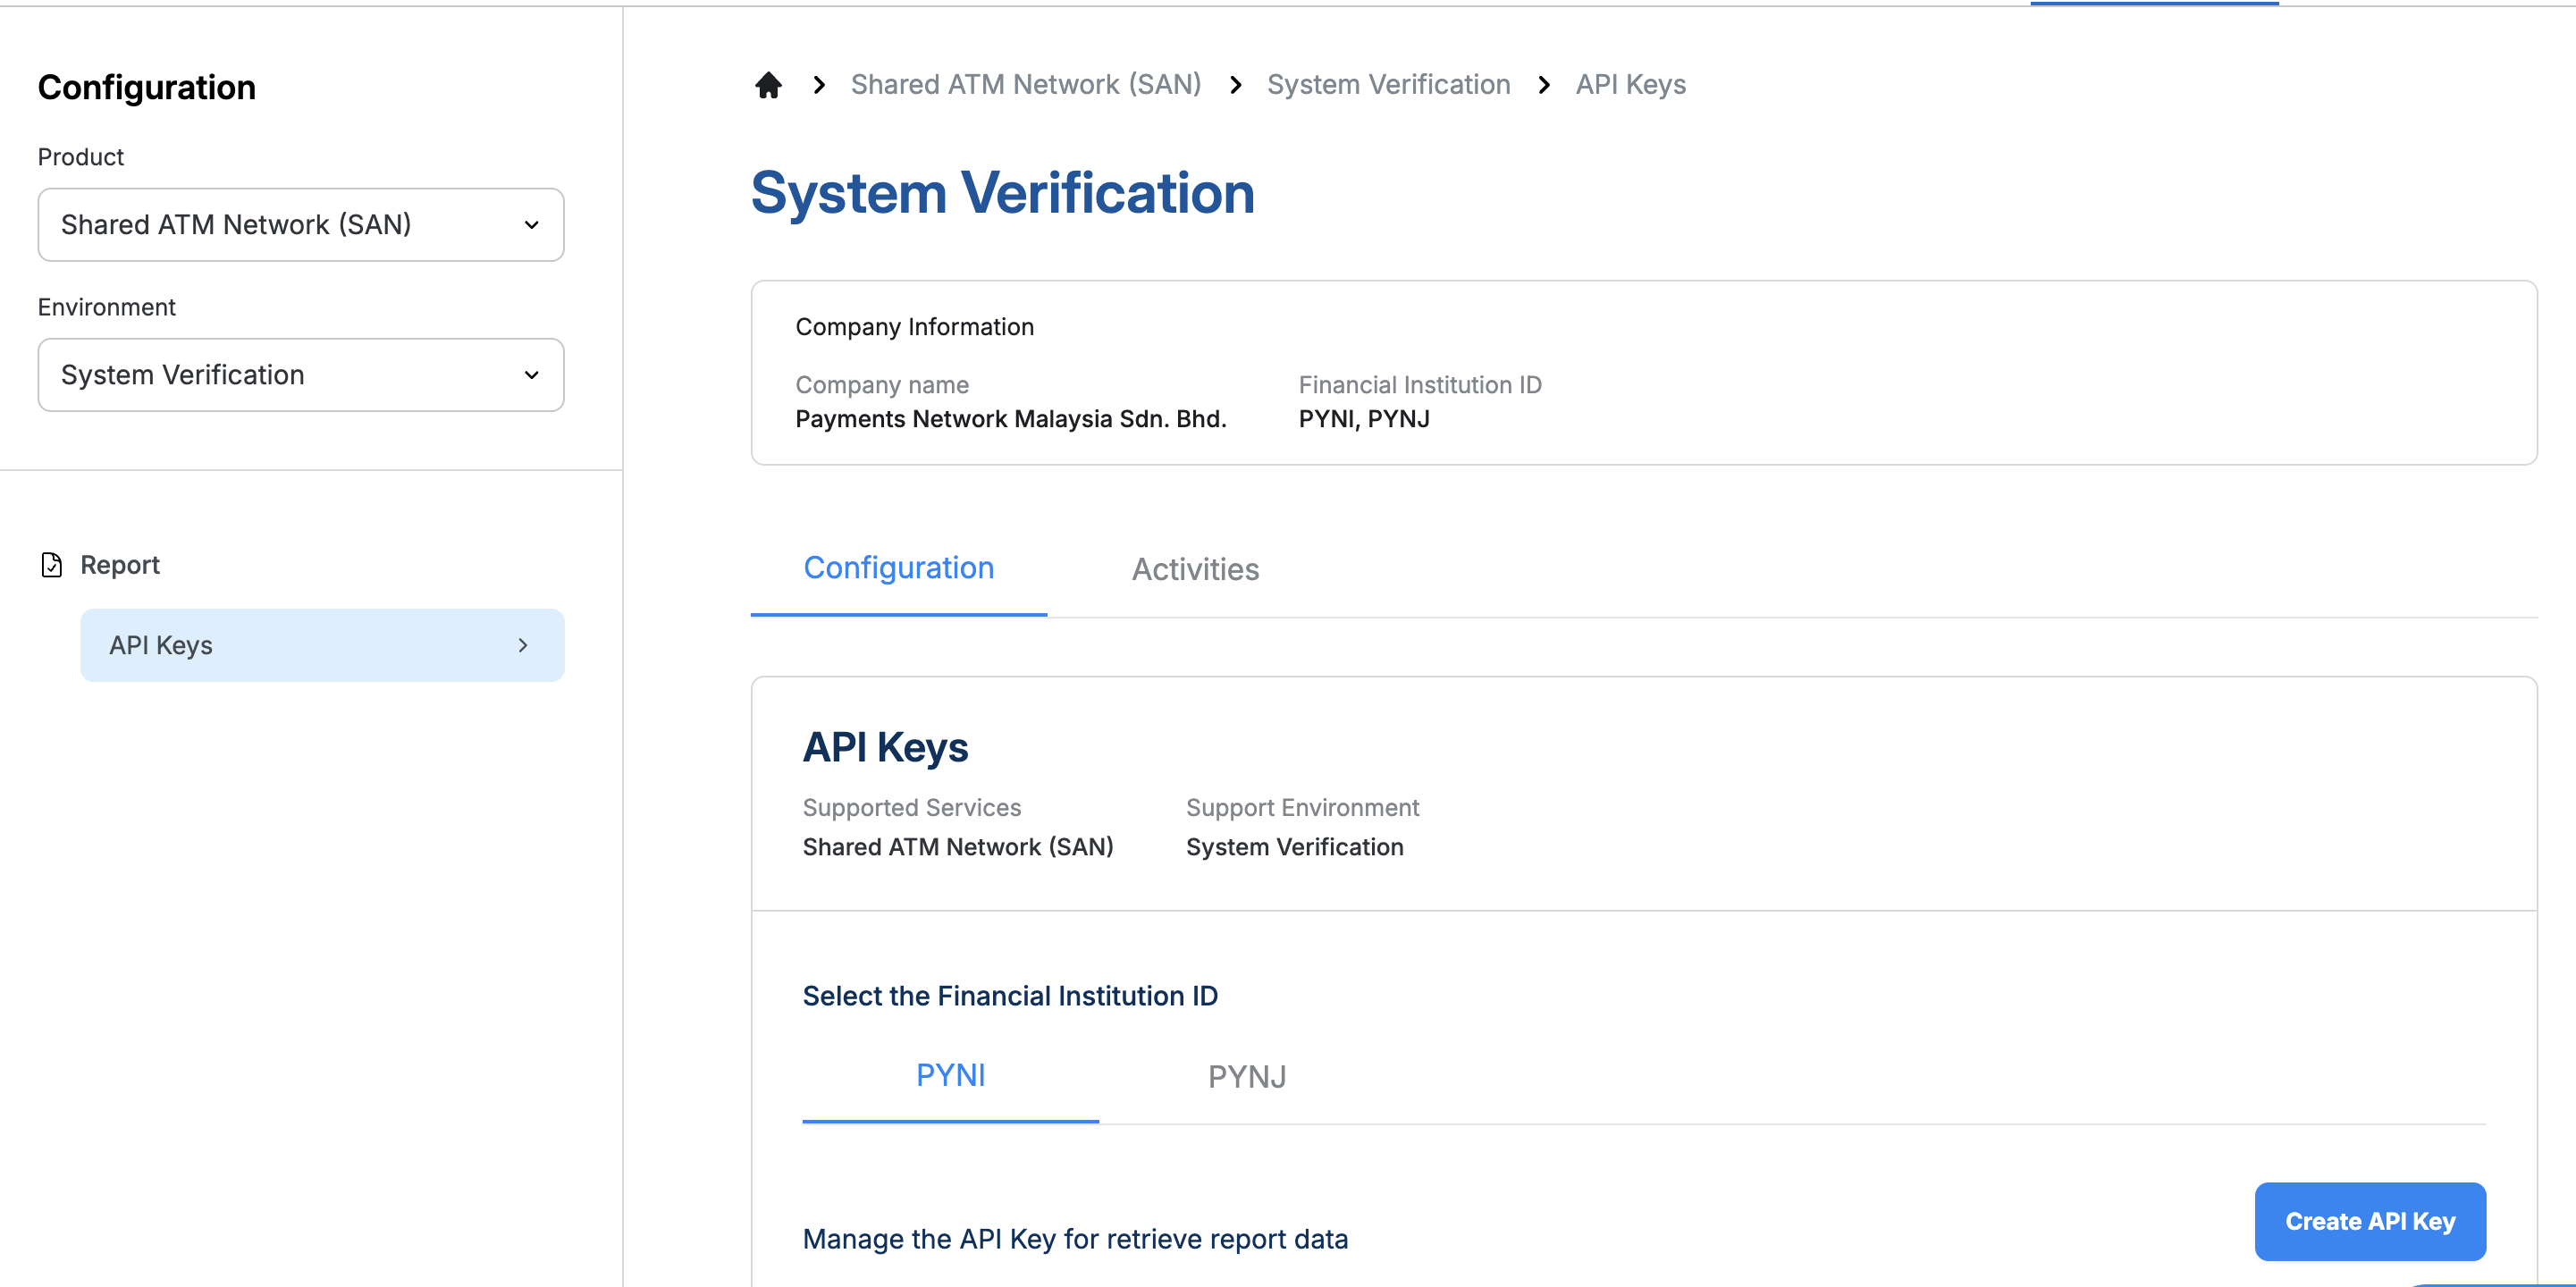
a. If first time (No API Keys configured)
- The API Keys section will be blank
- Click "Create API Key" button to generate new API Keys
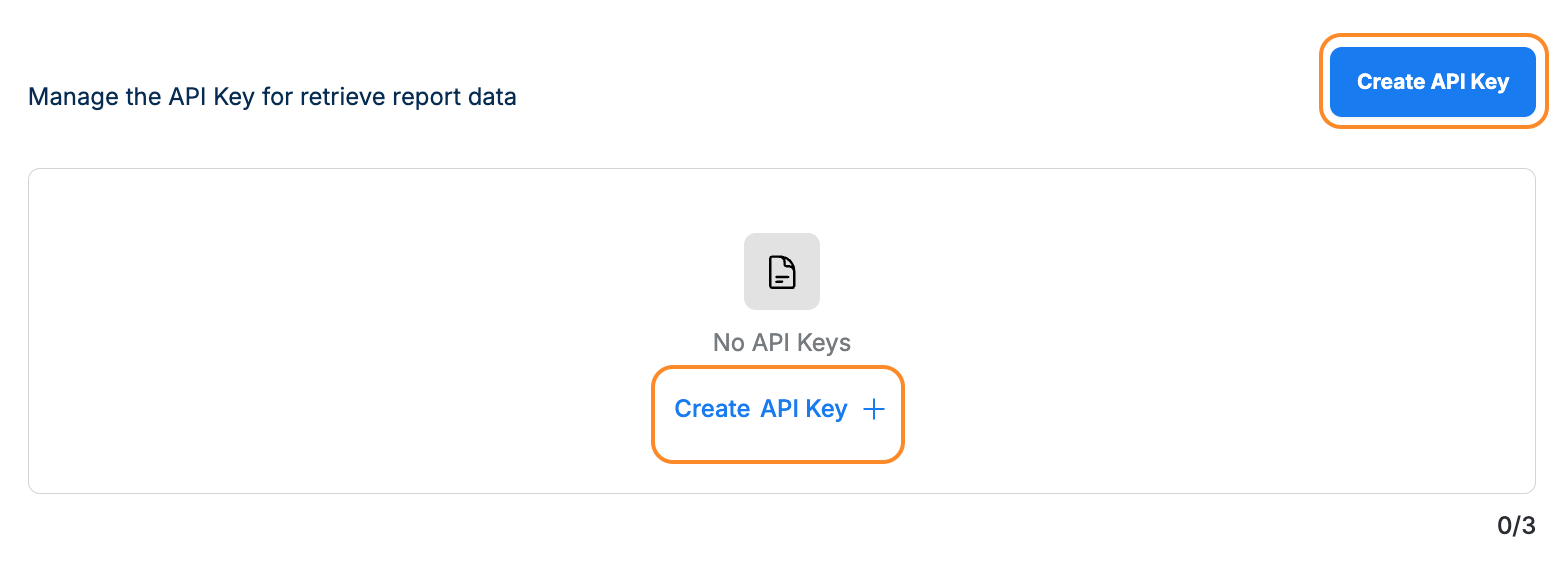
- Client ID and Client Secret will be displayed
- Save these credentials securely
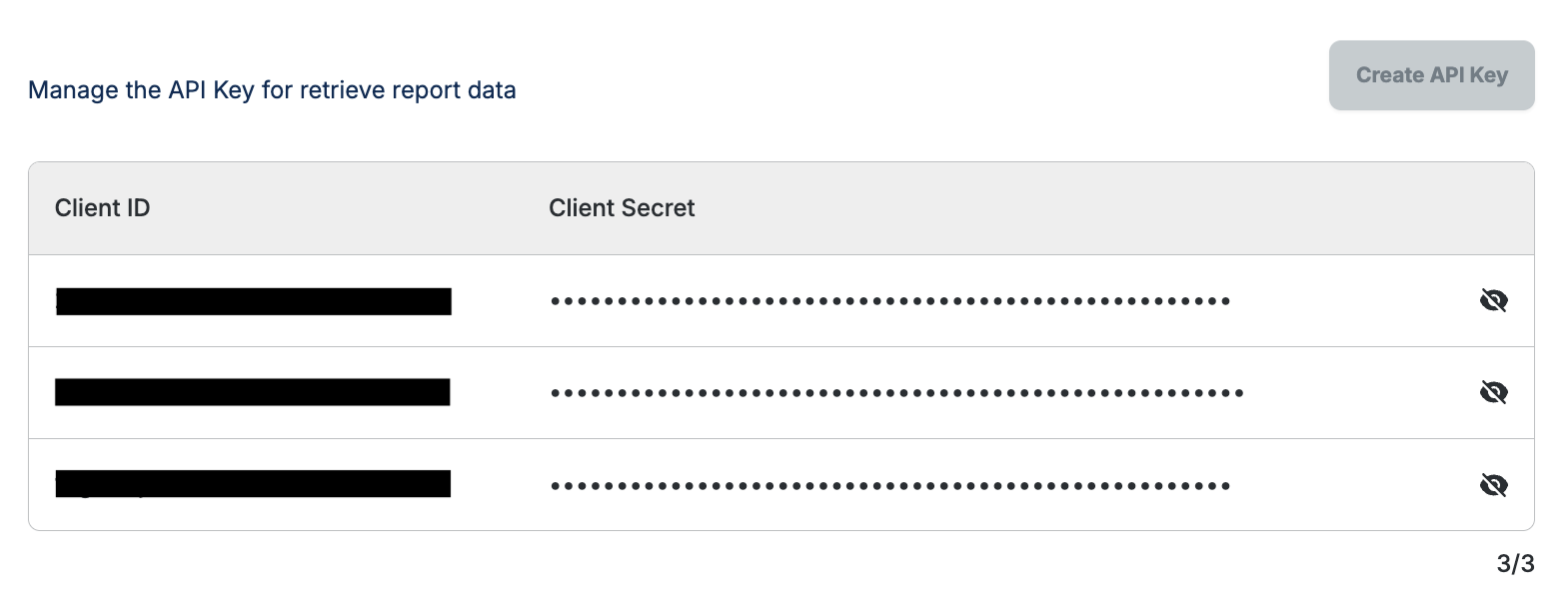
b. If API Keys Already Exists
Your existing Client ID and Client Secret will be displayed in the test suite configuration
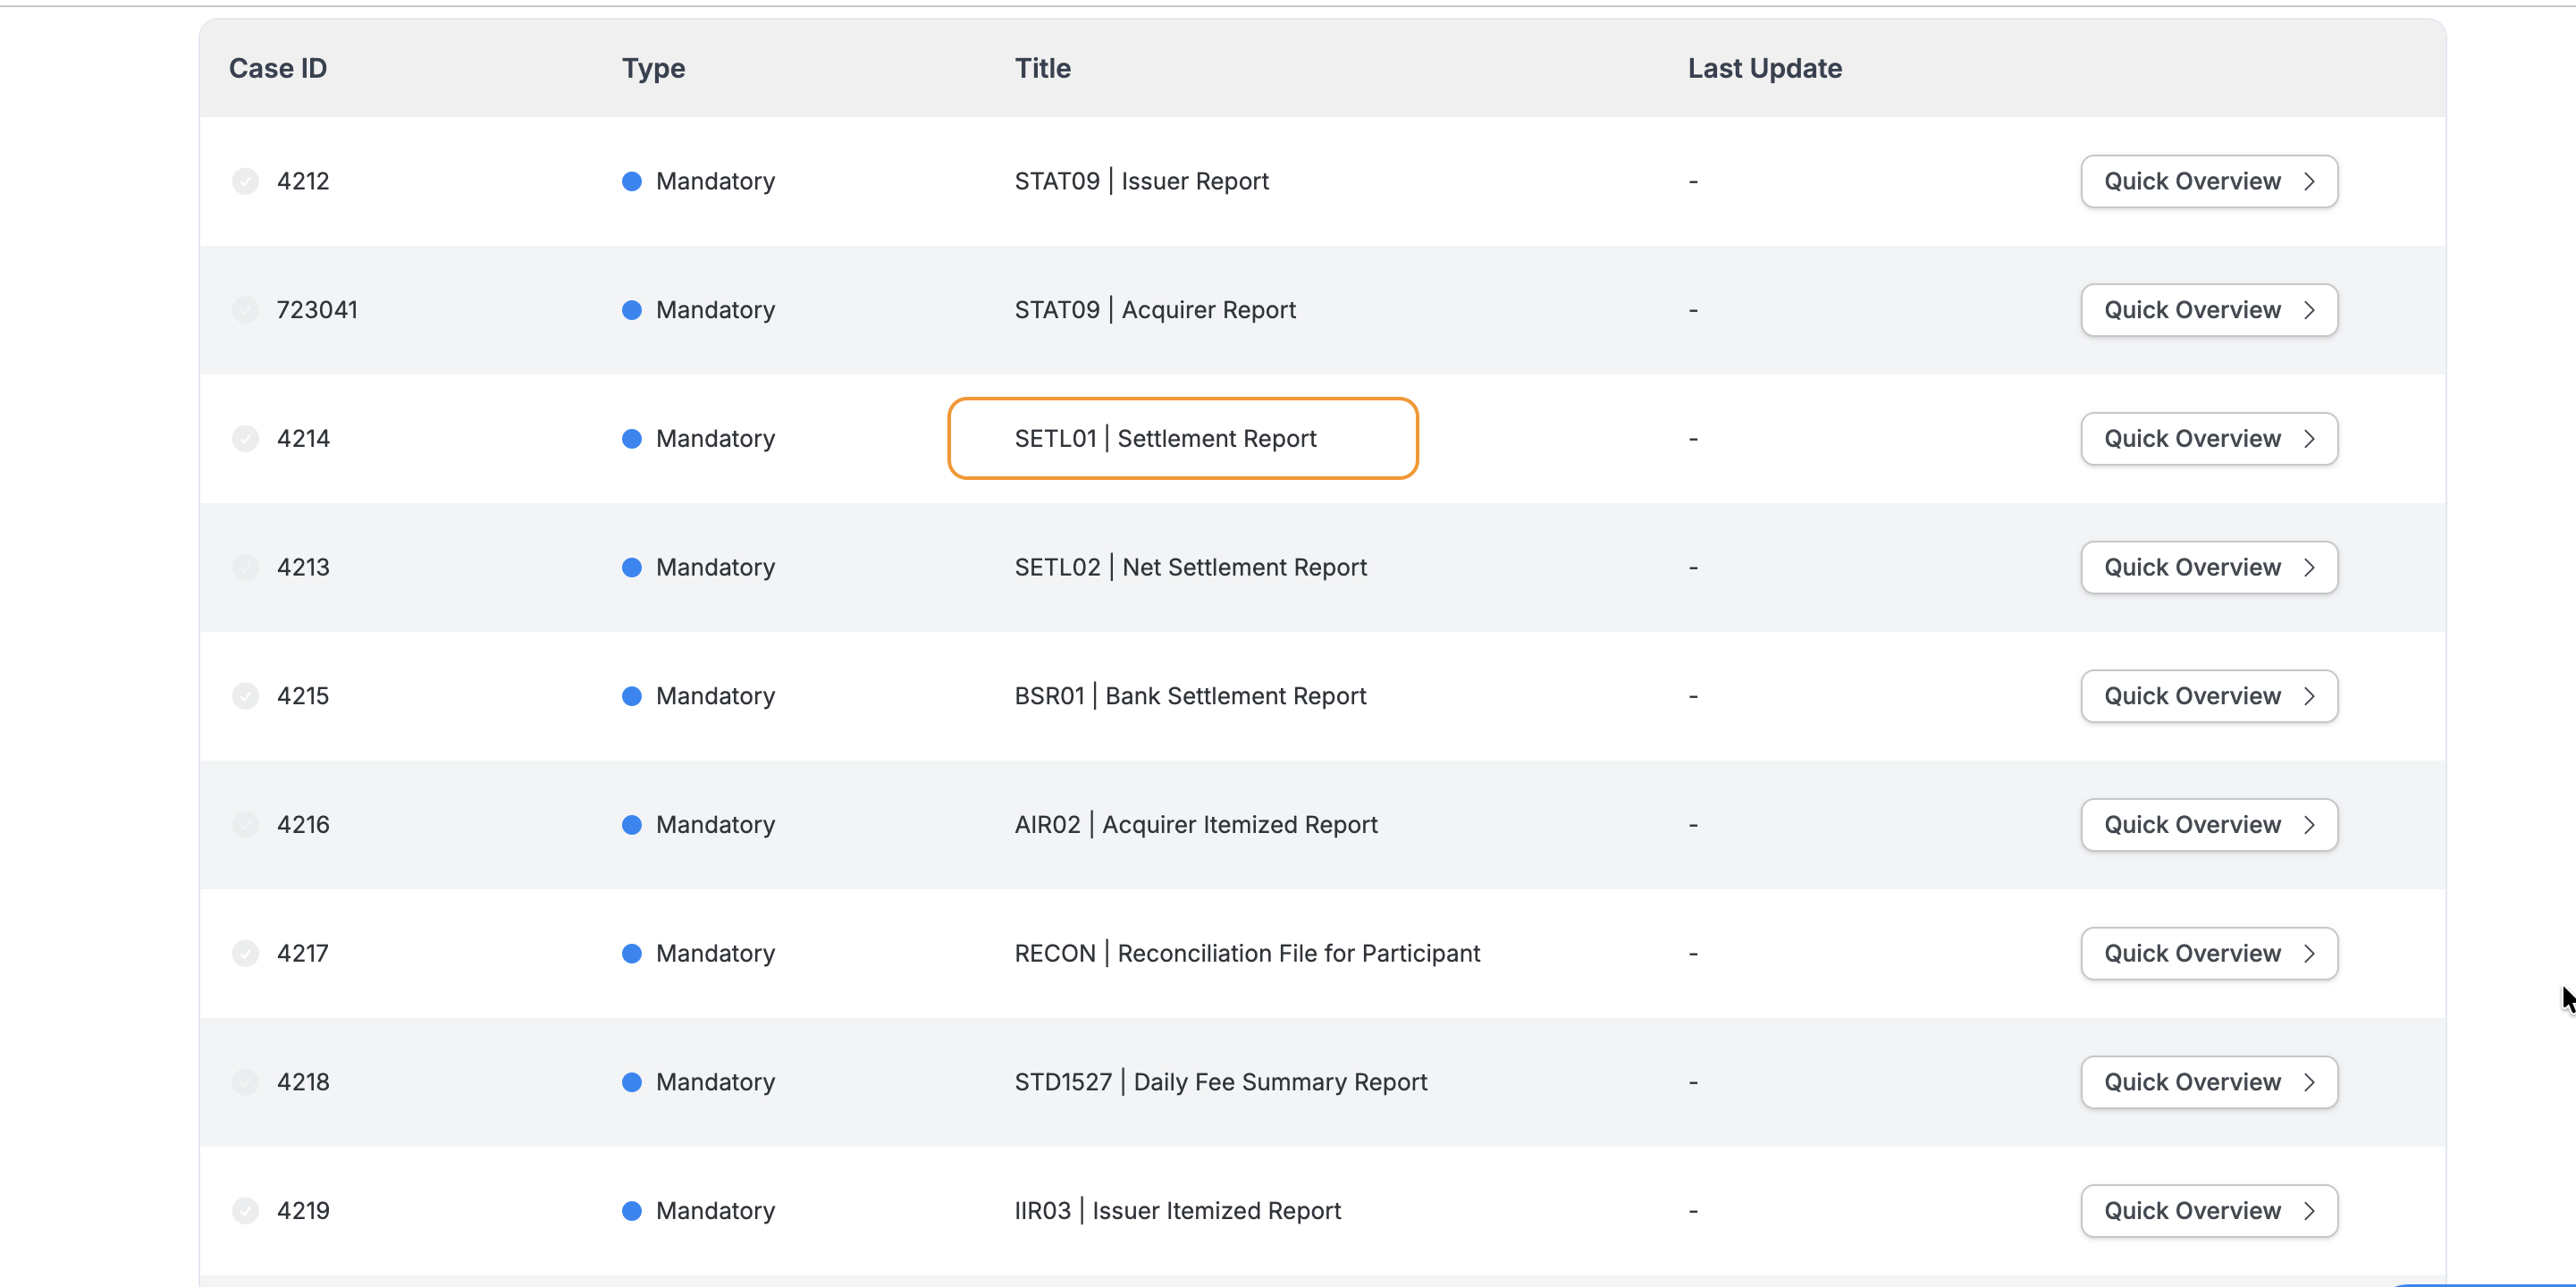
Step 3: Navigate to Test Case
- Return to SAN Reports test suite
- Select a test case to validate by clicking on the title
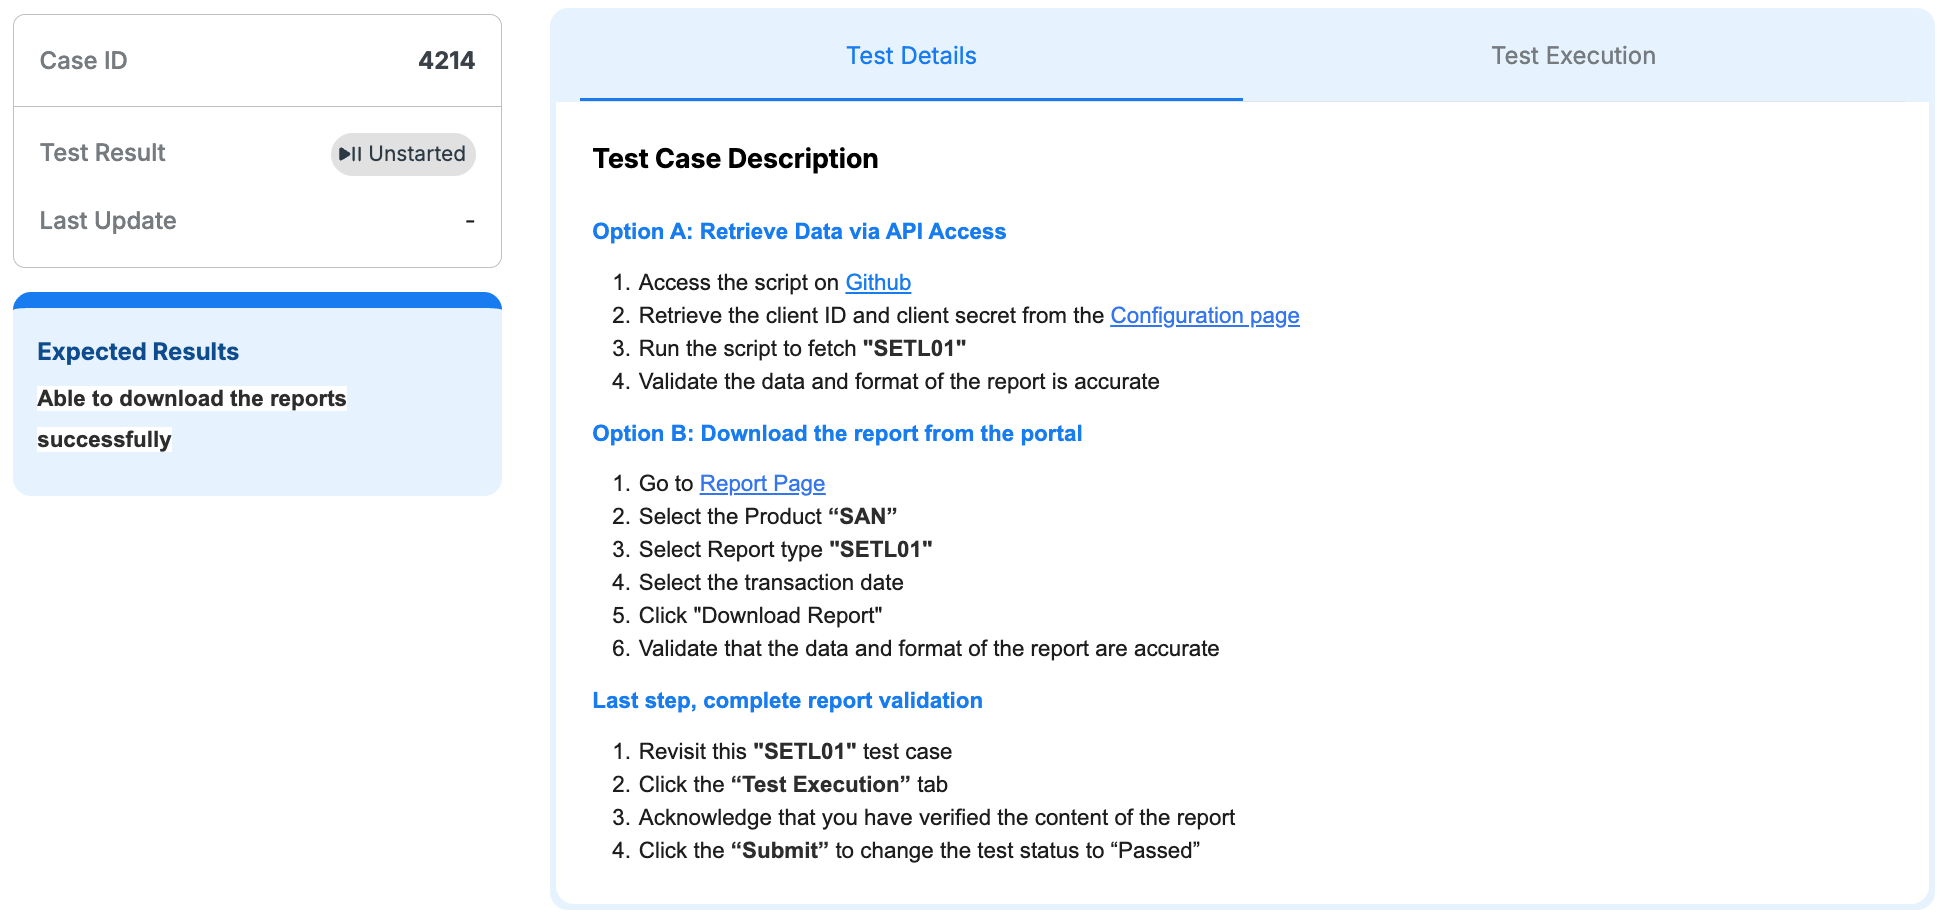
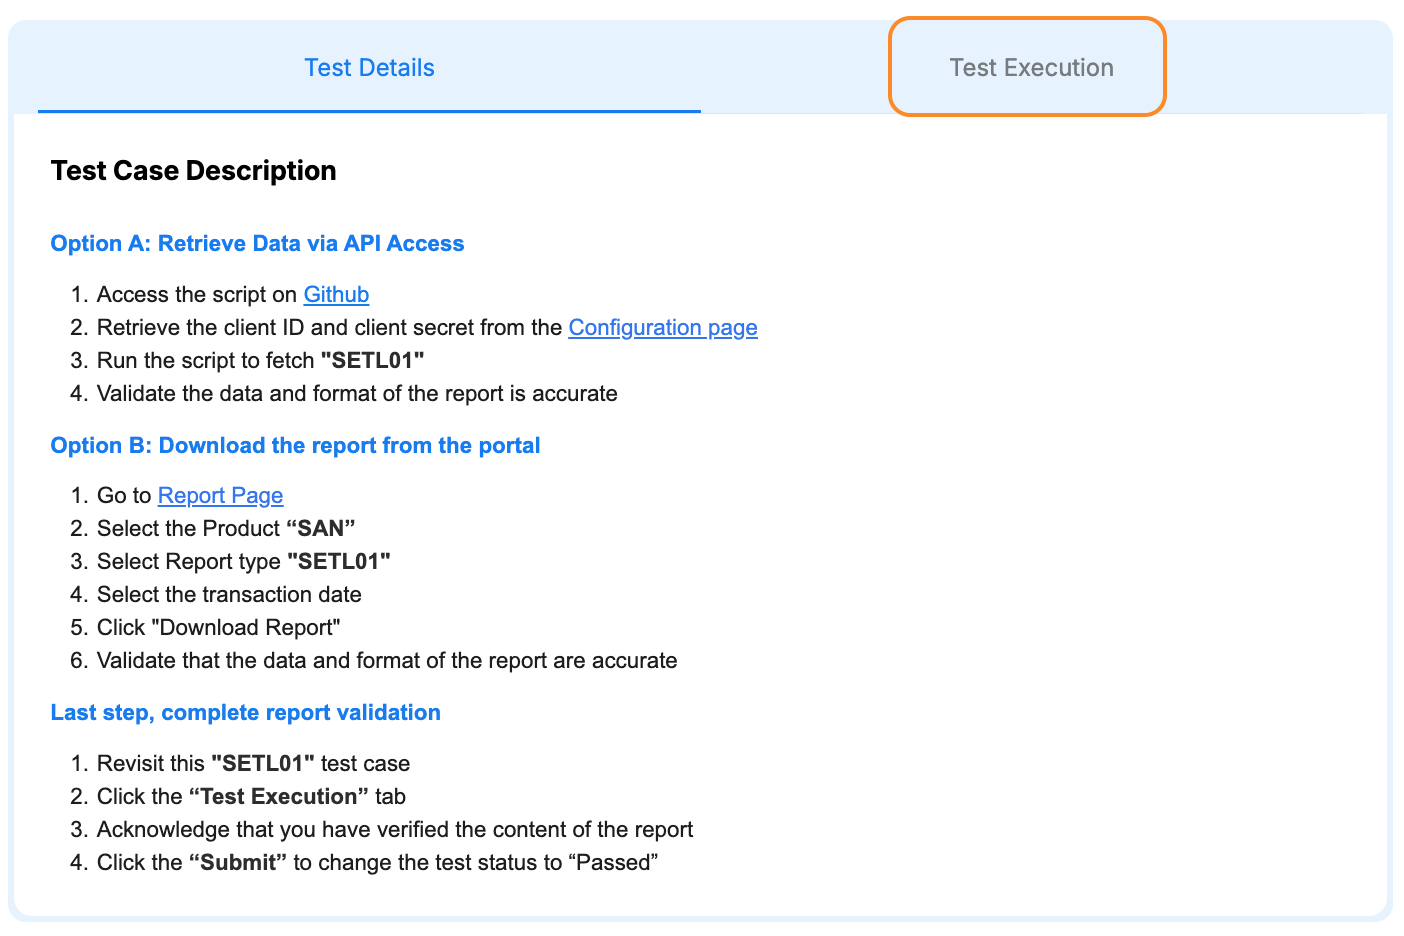
Step 4: Review Test Instructions
You will see two tabs:
- Test Details (default)
- Test Execution
Review the instructions in the Test Details tab
Step 5: Download and Verify Report
Option A: API Access Method
- Follow instructions in test case description
- Access provided GitHub script
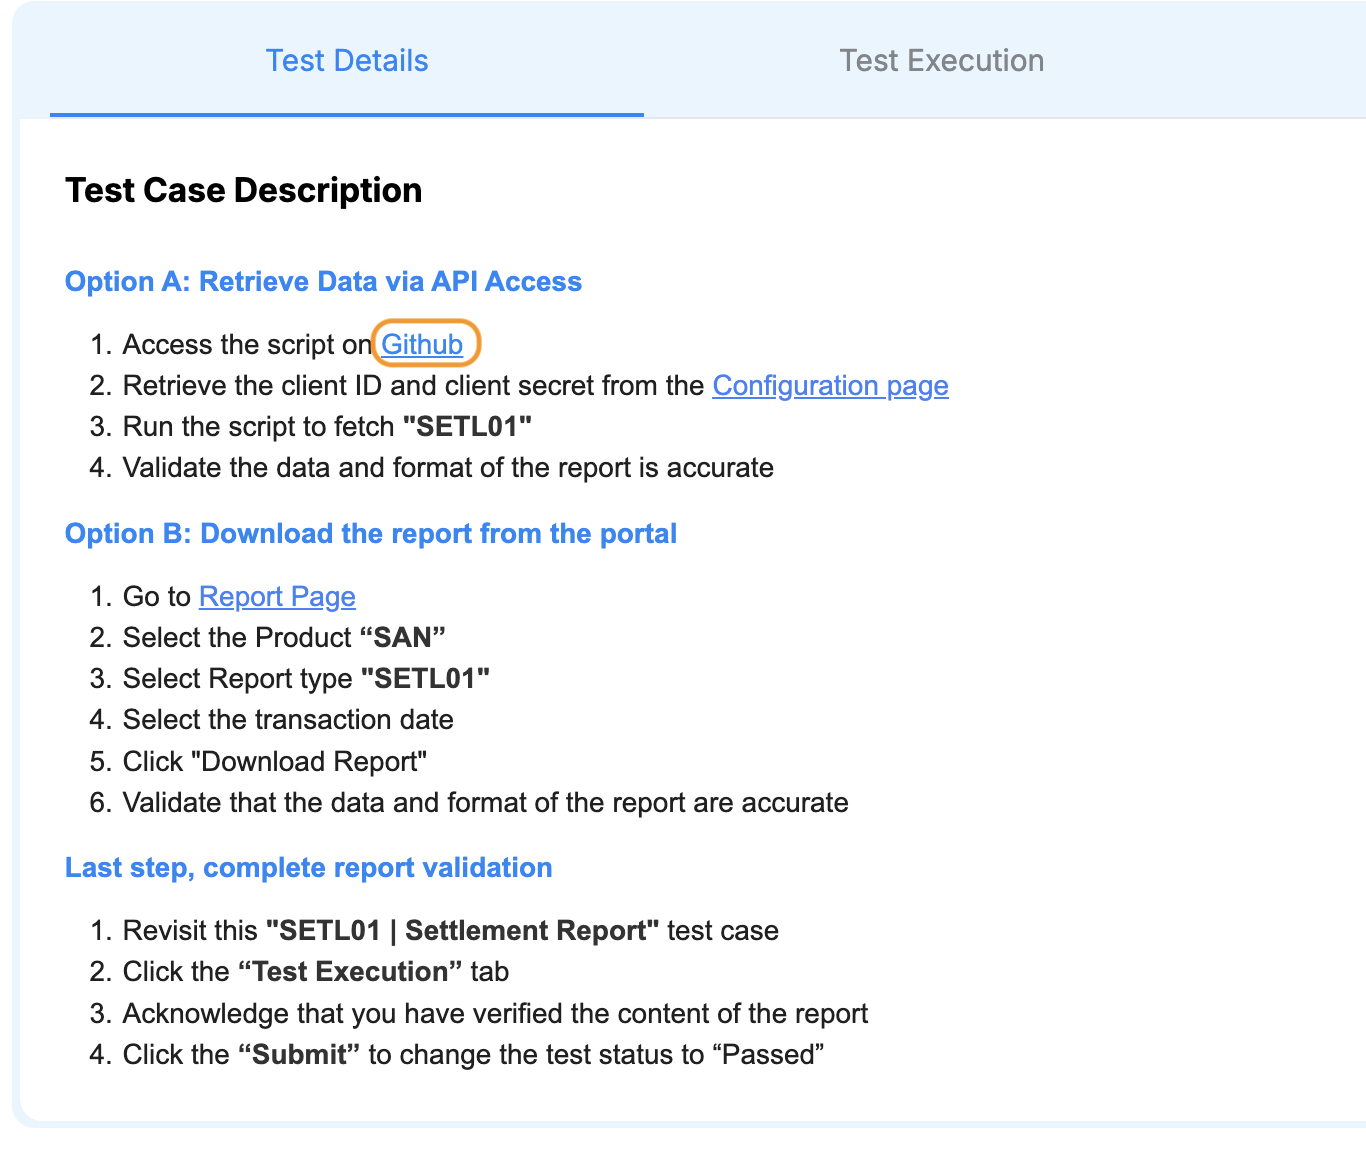
- Use the Client ID and Client Secret from Configuration
- Follow the GitHub documentation to retrieve the report via API
- Validate the report data and format
Option B: Portal's UI Method
- Click “Report Page” link in test case
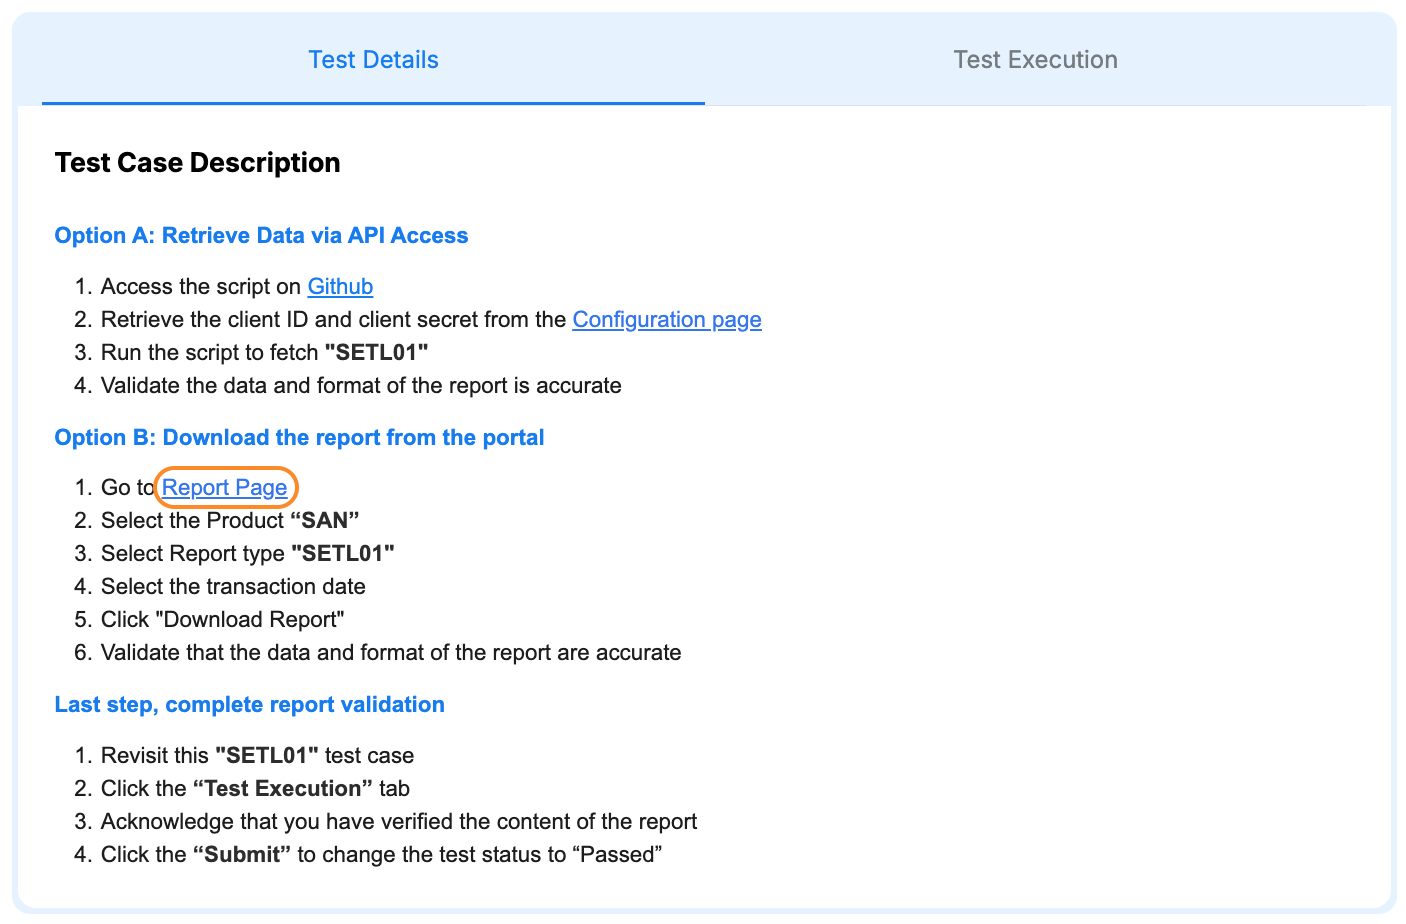
- A new tab will open with the Reports page
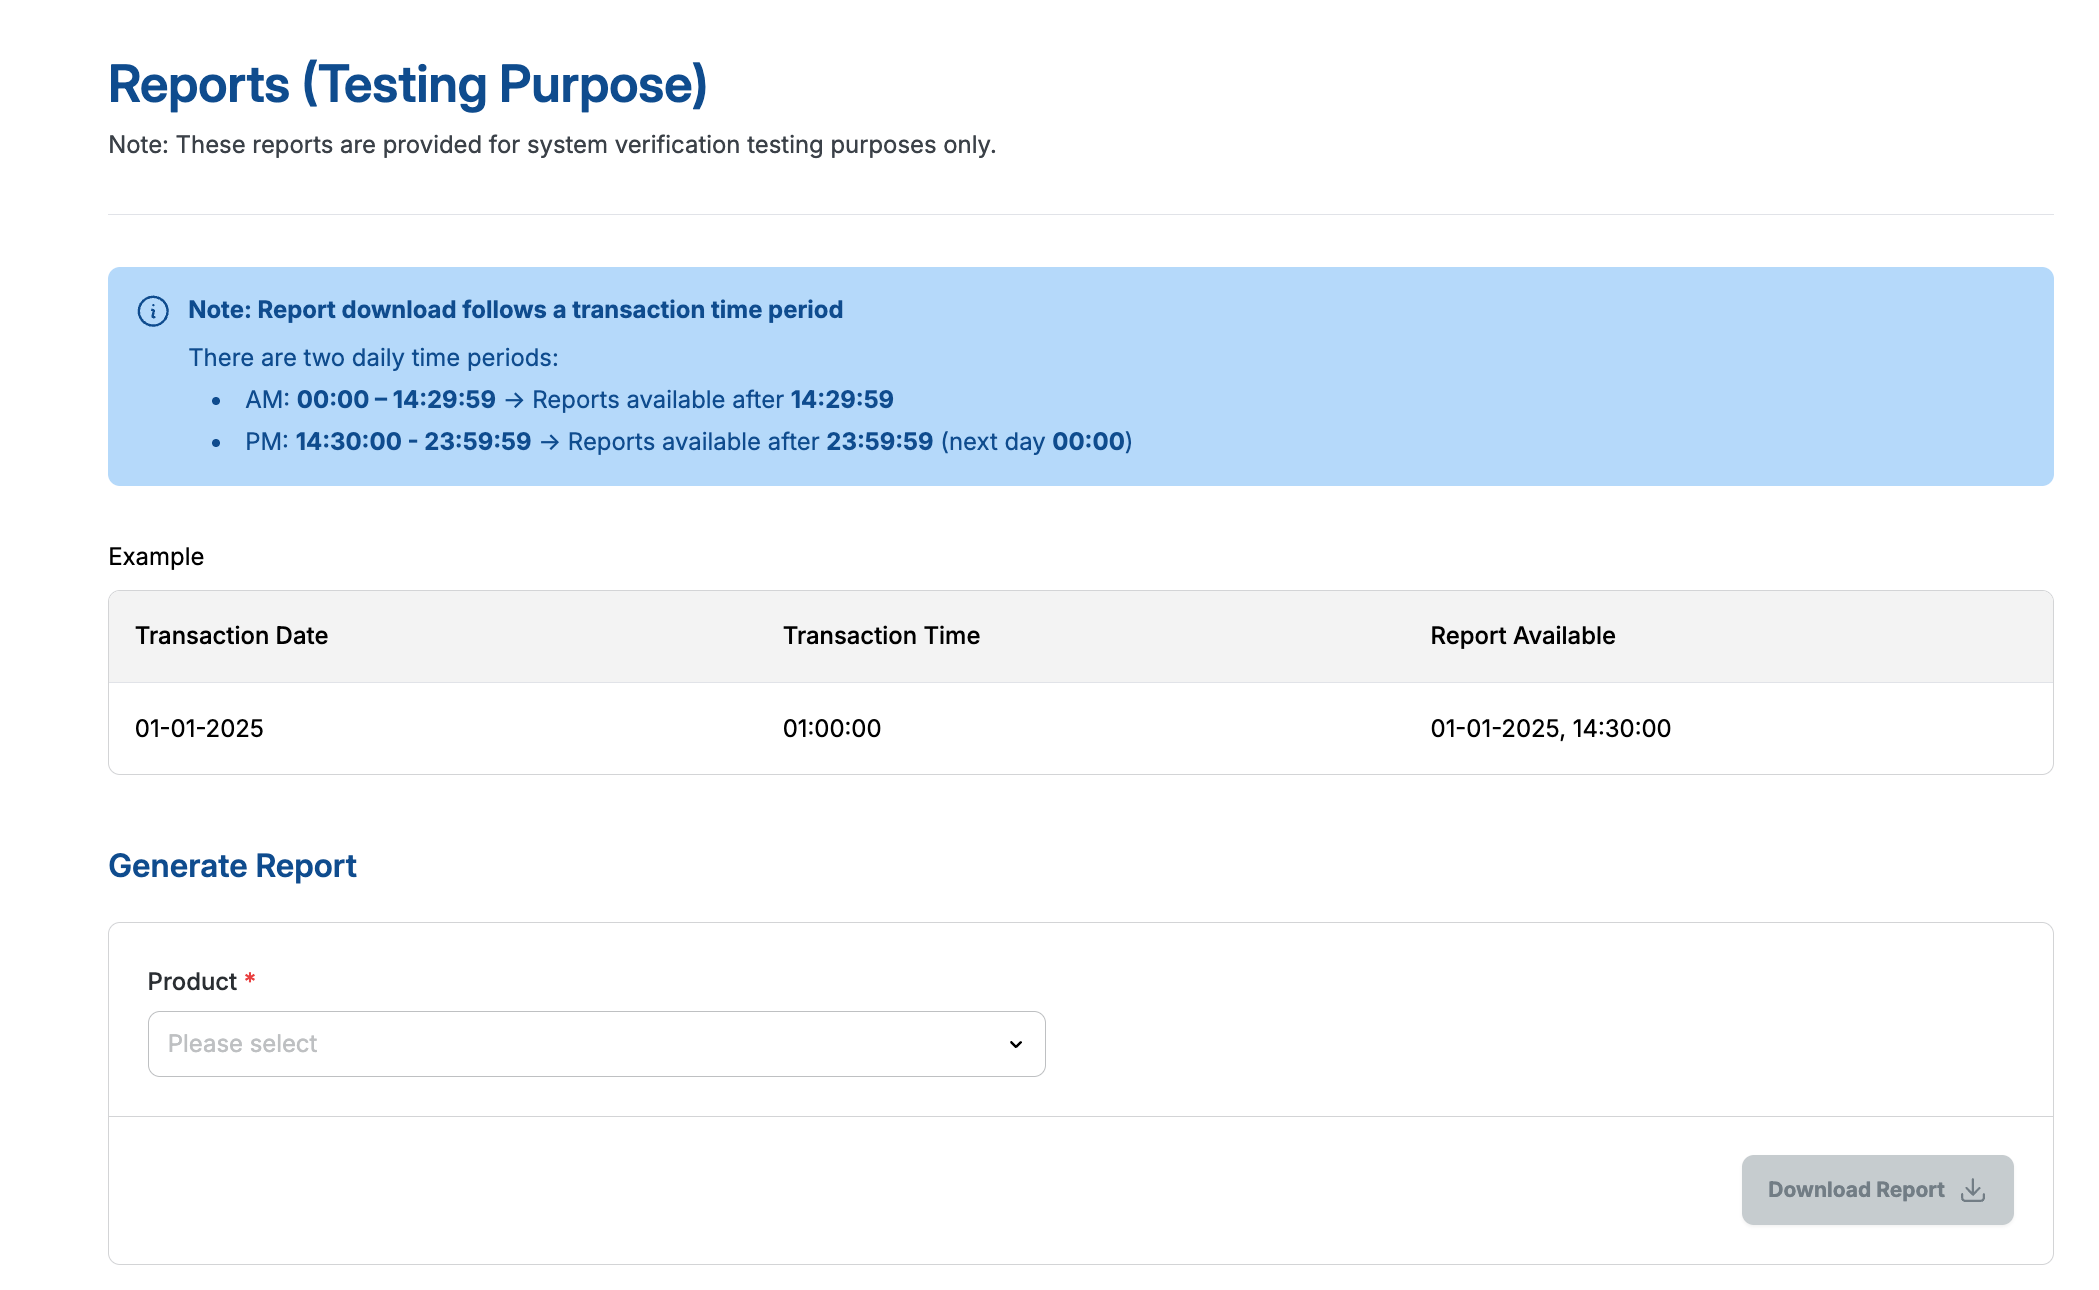
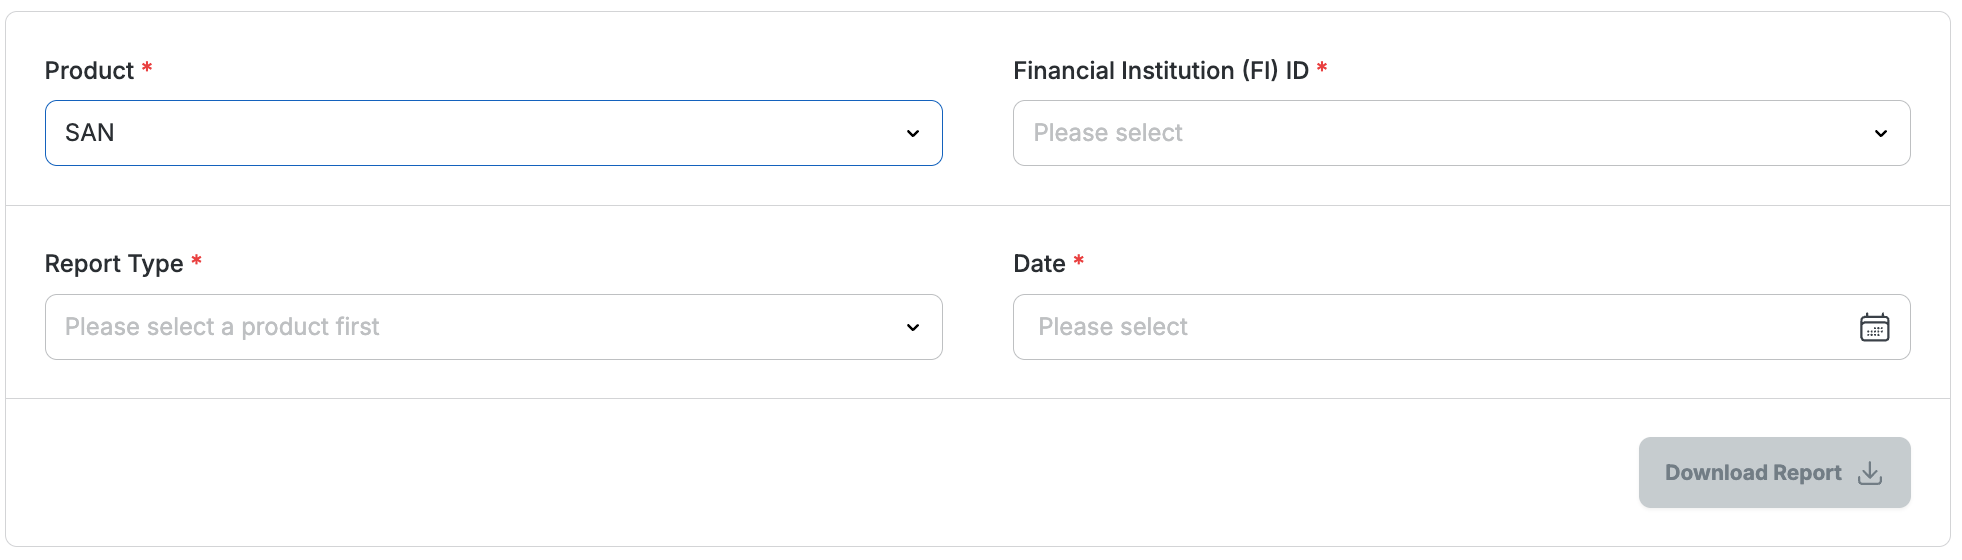
- Under "Product" dropdown, select "SAN"
- Three new fields will appear:
- Financial Institution (FI) ID: Select your FIID
- Report Type: Select the report type based on your test case (e.g., "SETL01")
- Date and Period: Choose the the date and period based on transactions you have performed previously
- Click “Download Report”
- Validate the report data and format
⚠️ Important: You must verify report accuracy before acknowledging the test case.
Step 6: Acknowledging the test case
- Go back to test case page
- Click “Test Execution” tab
- Locate Test Acknowledgement section
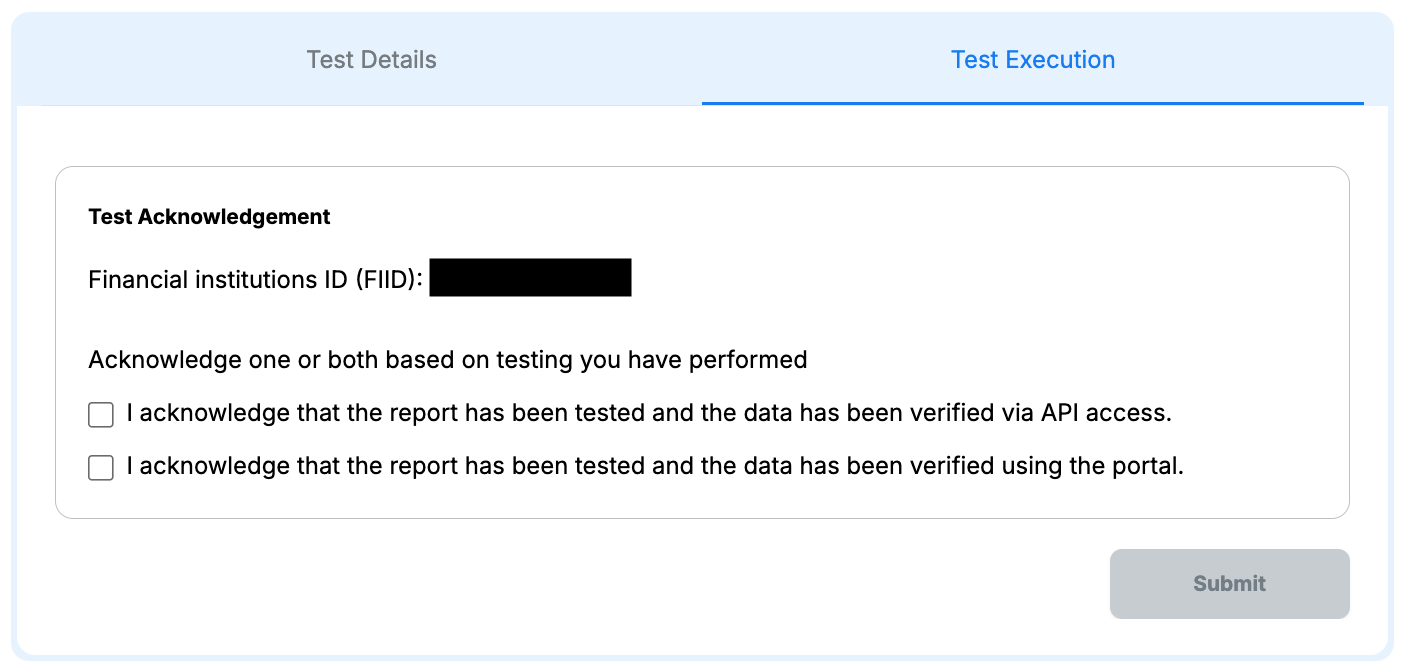
- Confirm your FIID
- Check one or both checkboxes based on the testing method(s) you performed
- Click “Submit”
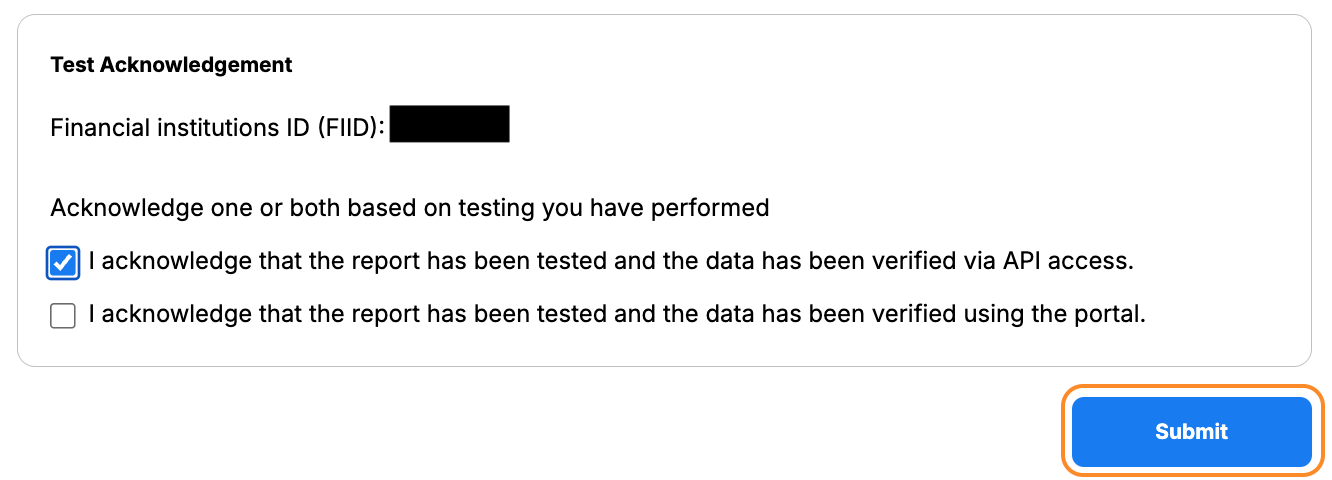
- Status changes from “Unstarted” → “Passed”

Troubleshooting
| Issue | Solution |
|---|---|
| Blank Test Acknowledgement | Ensure FIID is saved, refresh page |
| Cannot create API Key | Max 3 API Keys per FIID |
| Report download fails | Check Product, FIID, Report Type, Date |
| GitHub script not working | Verify Client ID & Secret |
| Test status not changing | Ensure checkbox selected before submit |
| General issues | Contact Developer Portal Support |