We've Launched a New Documentation Website (Beta Launch)
The documentation for DuitNow is now available on our newly launched documentation platform. This is an initial beta rollout of our new documentation site, designed to become the long-term home for all documentation moving forward.
You'll find the familiar content you're used to—now hosted on a new platform that will progressively receive updates and enhancements.
We encourage you to start accessing DuitNow materials there to explore the new experience and ensure you're viewing the latest documentation updates. If you have any feedback, please reach out to us.
Visit the New Documentation WebsiteCreate Project
After you have successfully logged in, you may proceed to create a project. Creating a project allows you to experience the configuration and testing of the selected API endpoints.
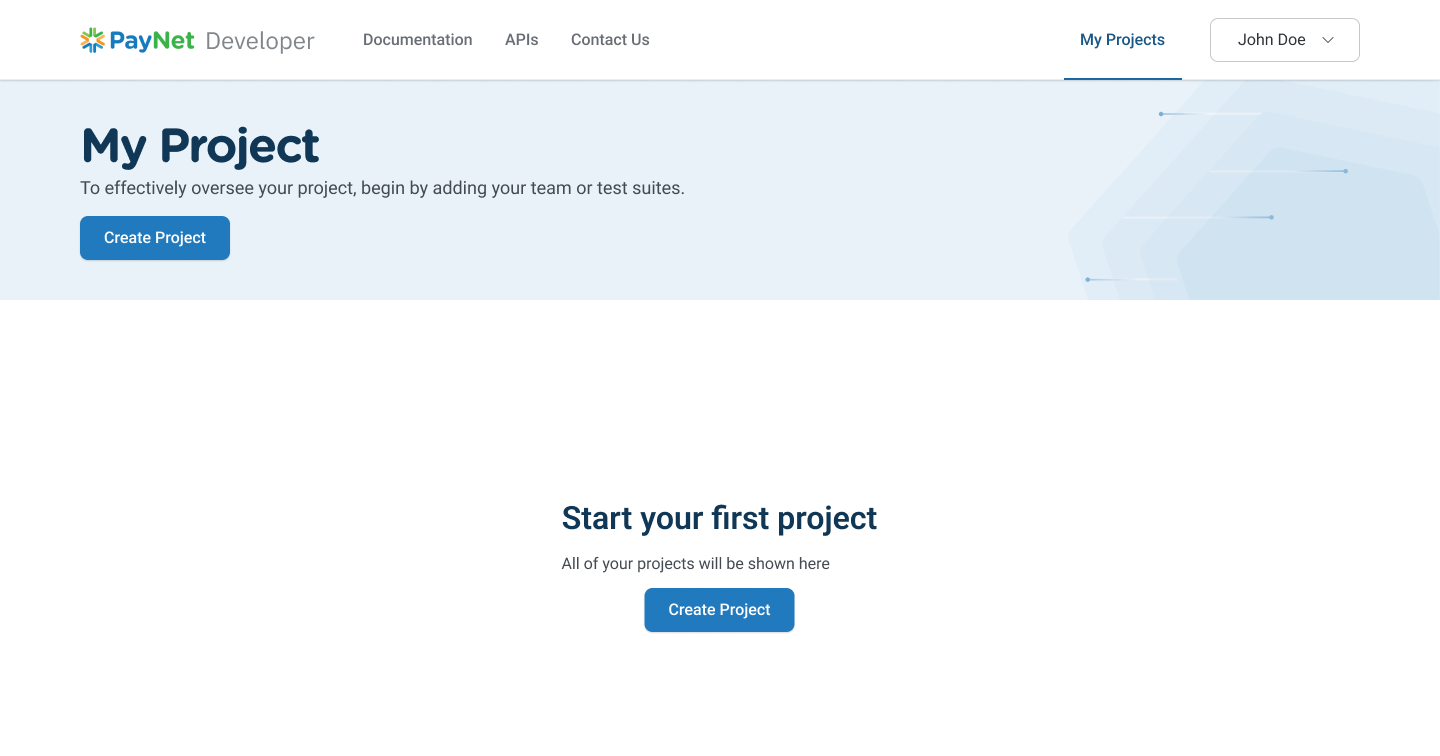
Step 1: To create a project, navigate to the My Projects page. From there, click the Create Project button.
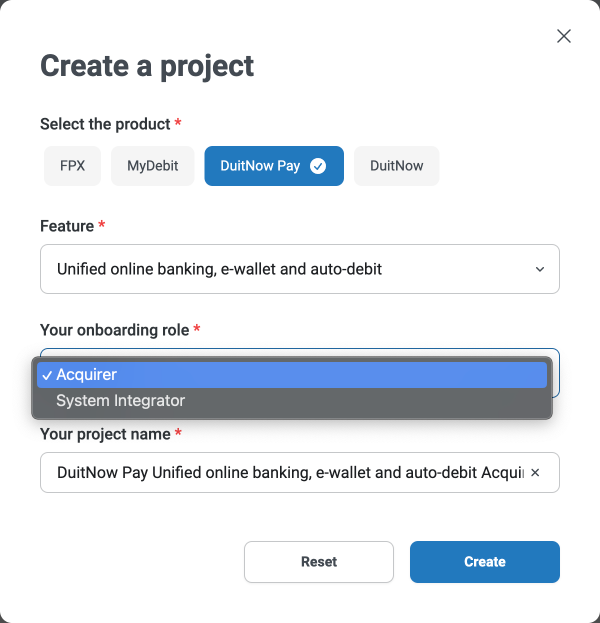
Step 2: Select a product, followed by the feature of the API for your project. Then, select the role that your organization will represent when using this product / API. The project name should be automatically filled in for you, which you can edit to your preference. Once this is completed, click Create to proceed.
The role that you will represent for the implementation of this product will be of an Acquirer. Please ensure this role is relevant to your company’s business type/model.
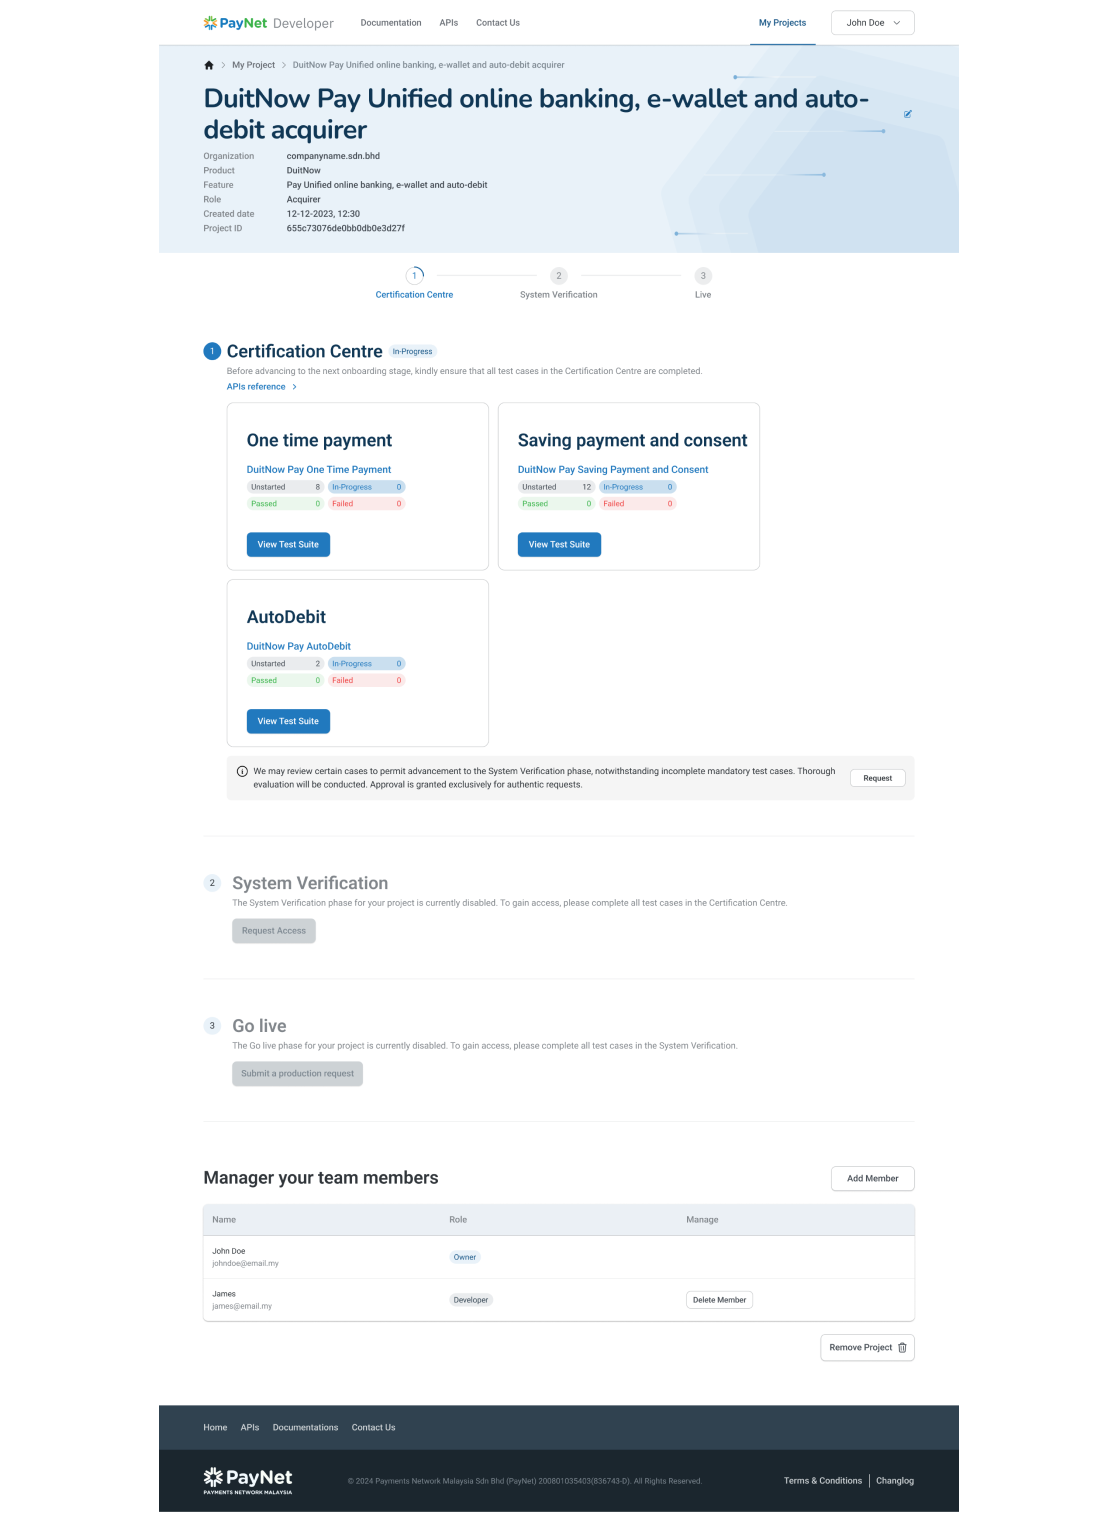
Once the project is successfully created, you may proceed with the necessary configuration and testing experience of the selected product.
- Step 3.1: Certification Centre facilitates your development and testing experience with the use of a simulator.
- Step 3.2: System Verification enables you to experience end-to-end configuration and testing for the selected product.
- Step 3.3: You may also manage other users who are involved in your project by adding or removing them when necessary. Other users given access to your project can view the testing details, and relevant configuration. However, only the owner of the project can delete a project.