We've Launched a New Documentation Website (Beta Launch)
The documentation for DuitNow is now available on our newly launched documentation platform. This is an initial beta rollout of our new documentation site, designed to become the long-term home for all documentation moving forward.
You'll find the familiar content you're used to—now hosted on a new platform that will progressively receive updates and enhancements.
We encourage you to start accessing DuitNow materials there to explore the new experience and ensure you're viewing the latest documentation updates. If you have any feedback, please reach out to us.
Visit the New Documentation WebsiteTest the Integration
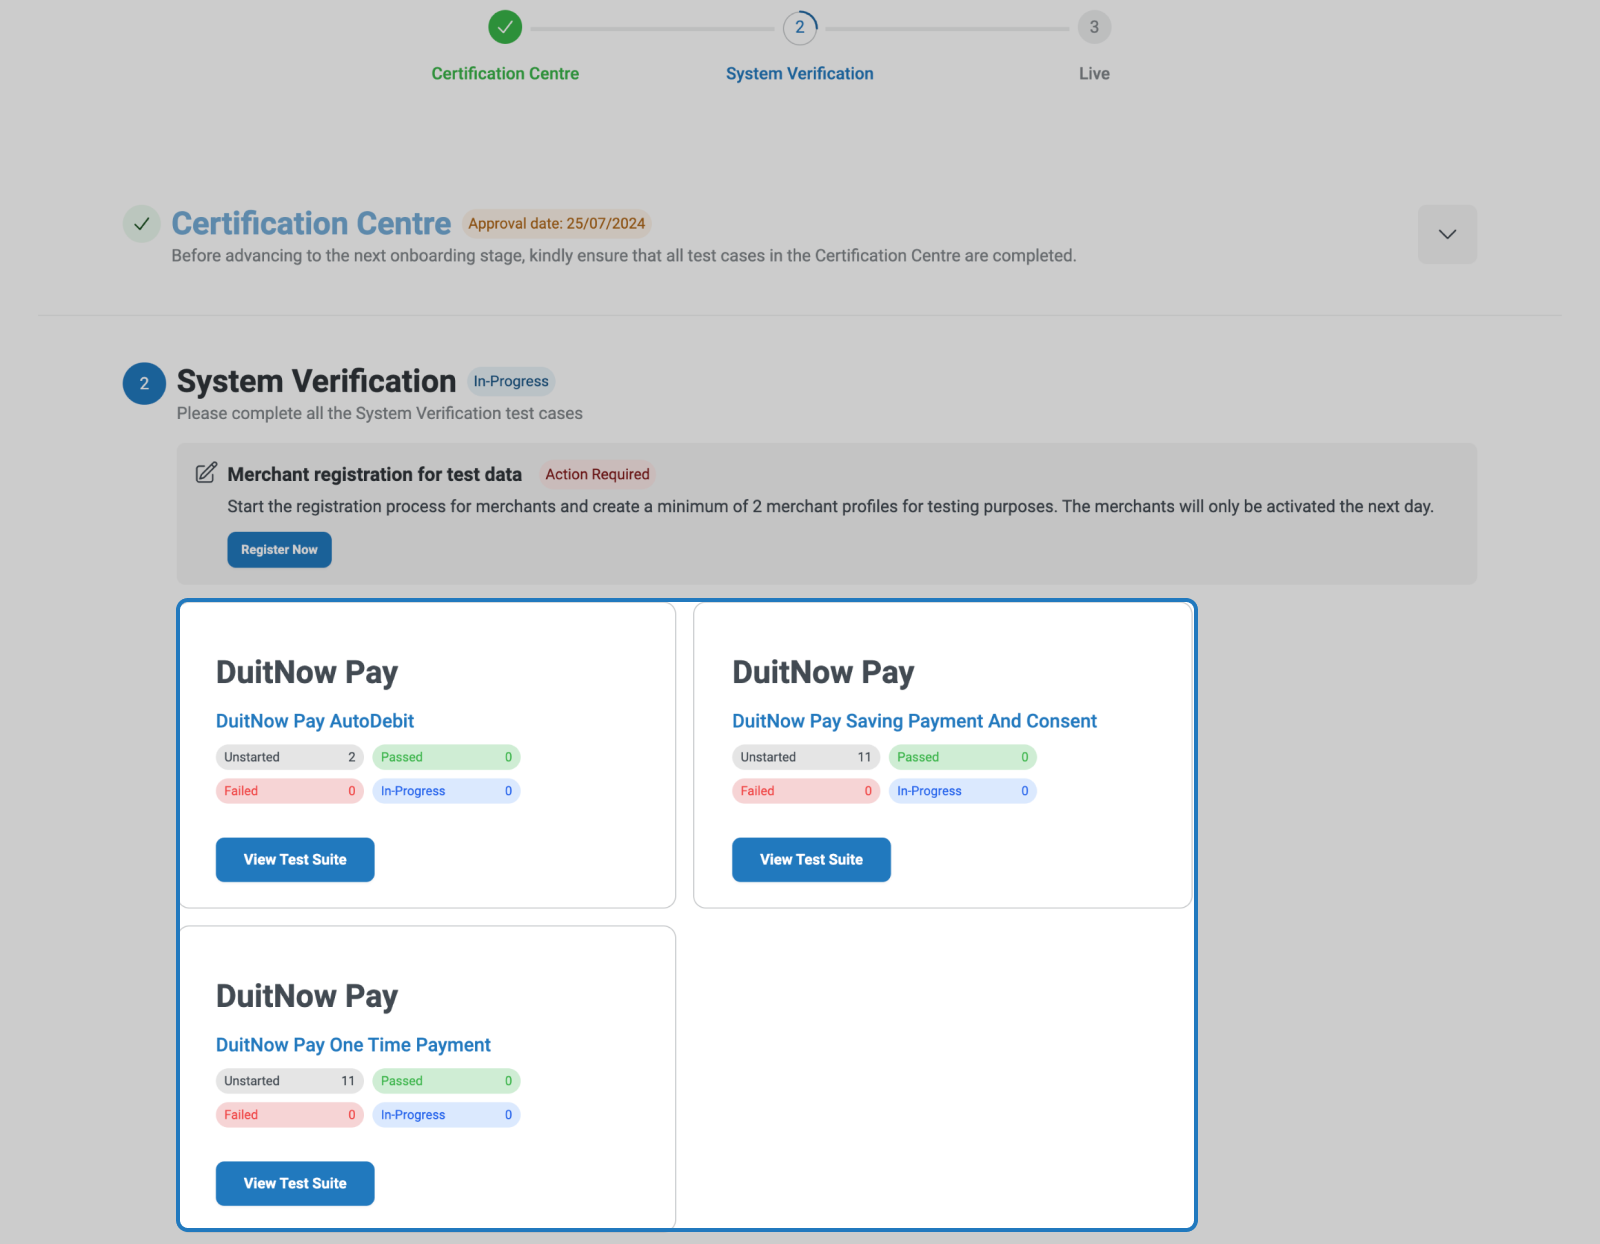
As part of the System Verification stage, you can start to execute test cases after PayNet has verified all the necessary information you have provided.
Disclaimer: PayNet may add more relevant or remove obsolete test cases from time to time.
Step 1: Click View Test Suite button to view the details and test cases of the specific service.
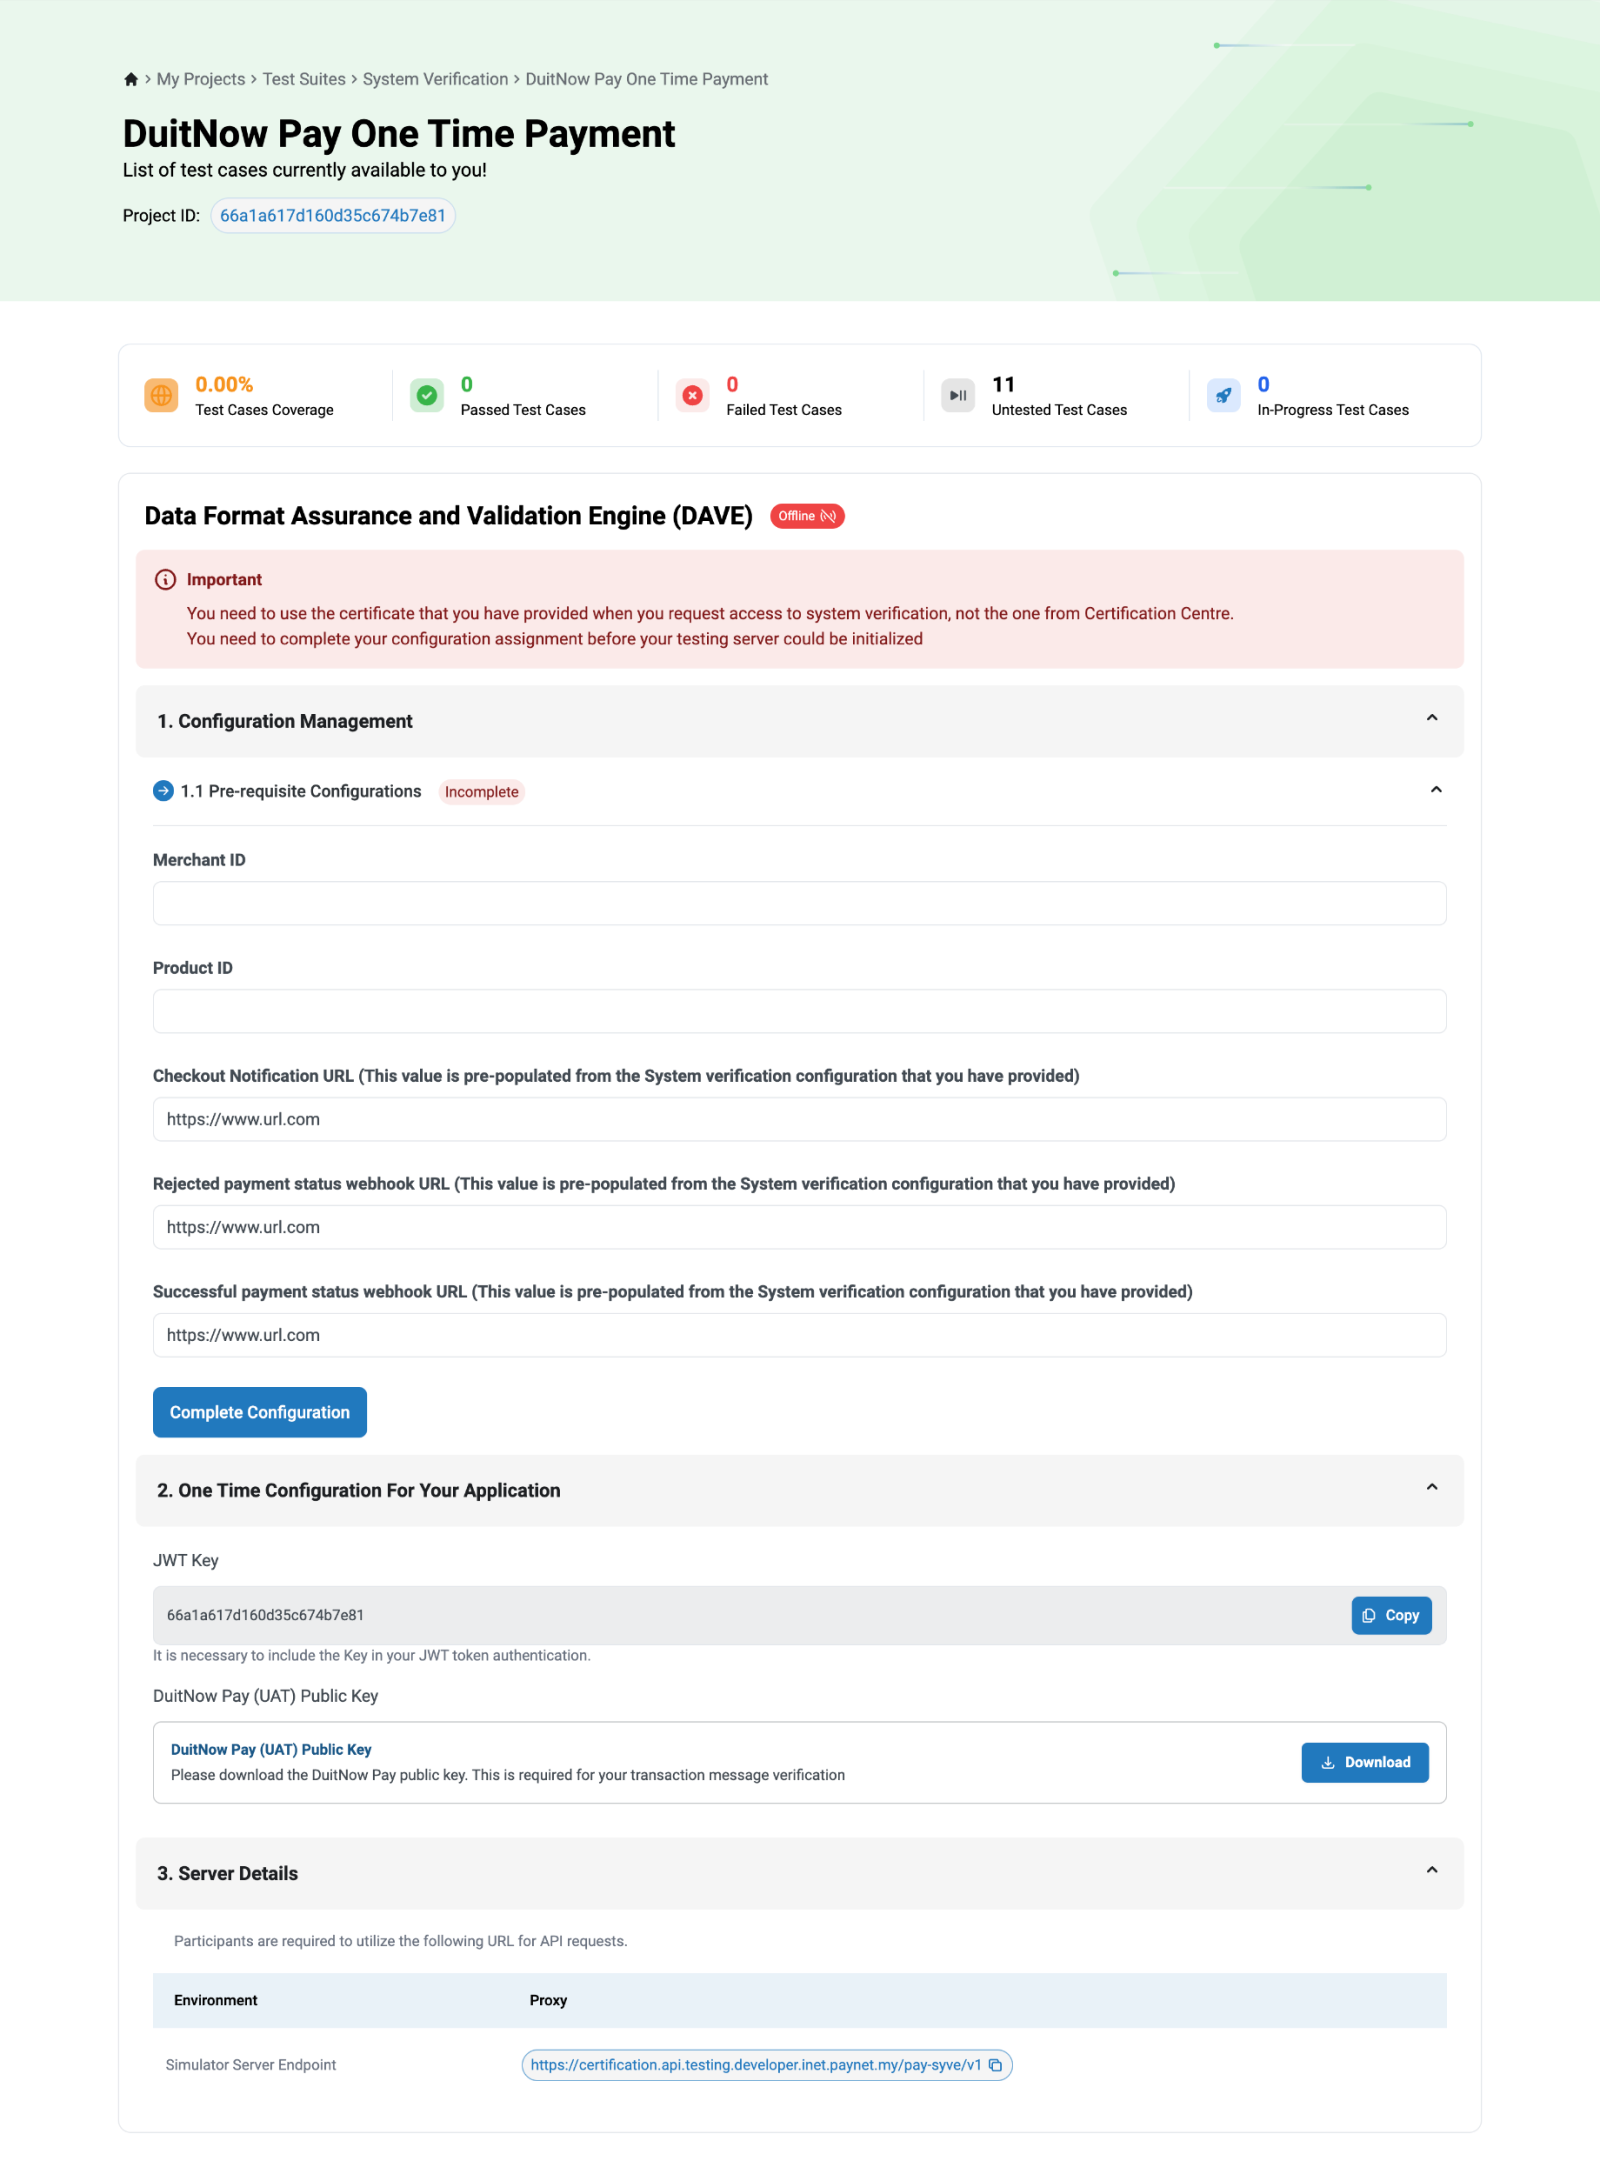
Step 2: Within the specific test suite detail page, you can provide the necessary configuration details, view and execute the test cases.
Step 2.1: In the Configuration Management section, you must provide the necessary information in order to proceed with executing the test cases. Click Complete Configuration button to save and submit the information entered. Once you have completed the necessary configuration, you can proceed with executing the test cases.
Step 2.2: In the One-Time Configuration For Your Application section, you can get the corresponding public key from PayNet for your transaction verification.
Note: This public key is corresponding to the certificate uploaded in the System Verification Server Configuration step.
Note:
The test cases provided are grouped by Type:
| Type | Definition |
|---|---|
| Pre-requisite | This test case must be passed before you can proceed to another test case. |
| Mandatory | This is a mandatory test case to pass. |
| Optional | This is an optional test case to pass. |
| PayNet-Assisted | This requires assistance from PayNet to run the test case. |
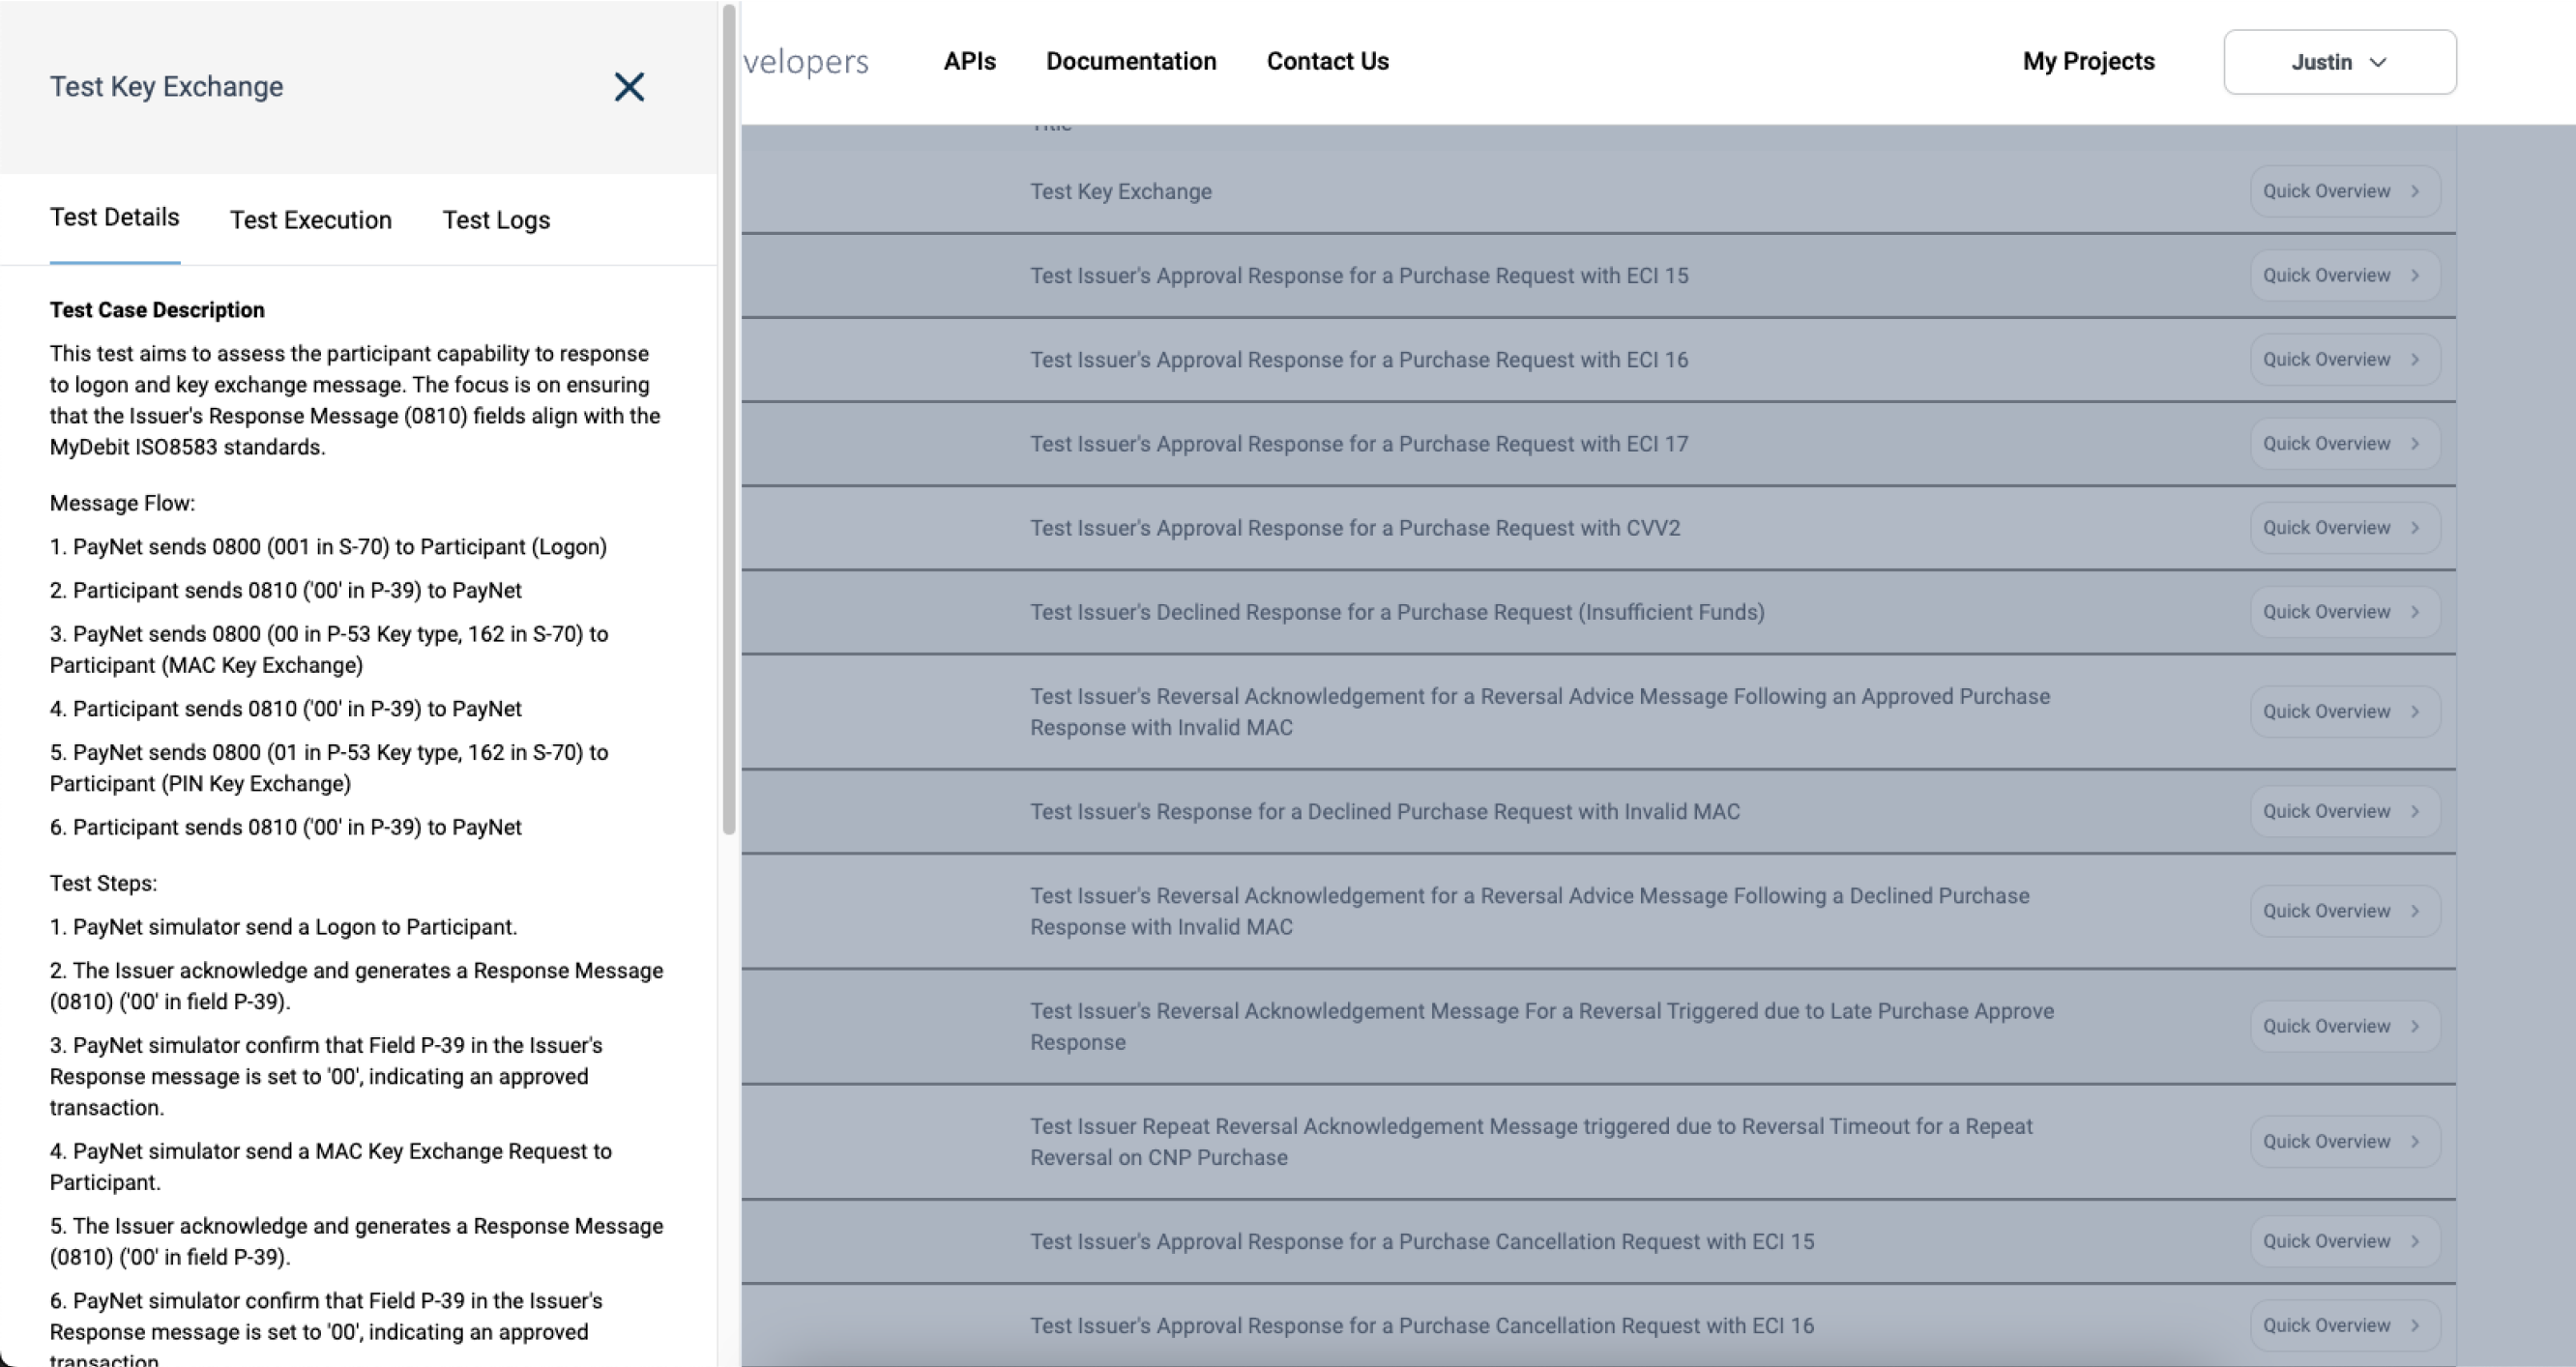
Step 2.3: At anytime, you can view test case details.
Step 2.3a: To do a quick glance with a side bar, click the Quick Overview button.

The details will be displayed on left-side of the page.
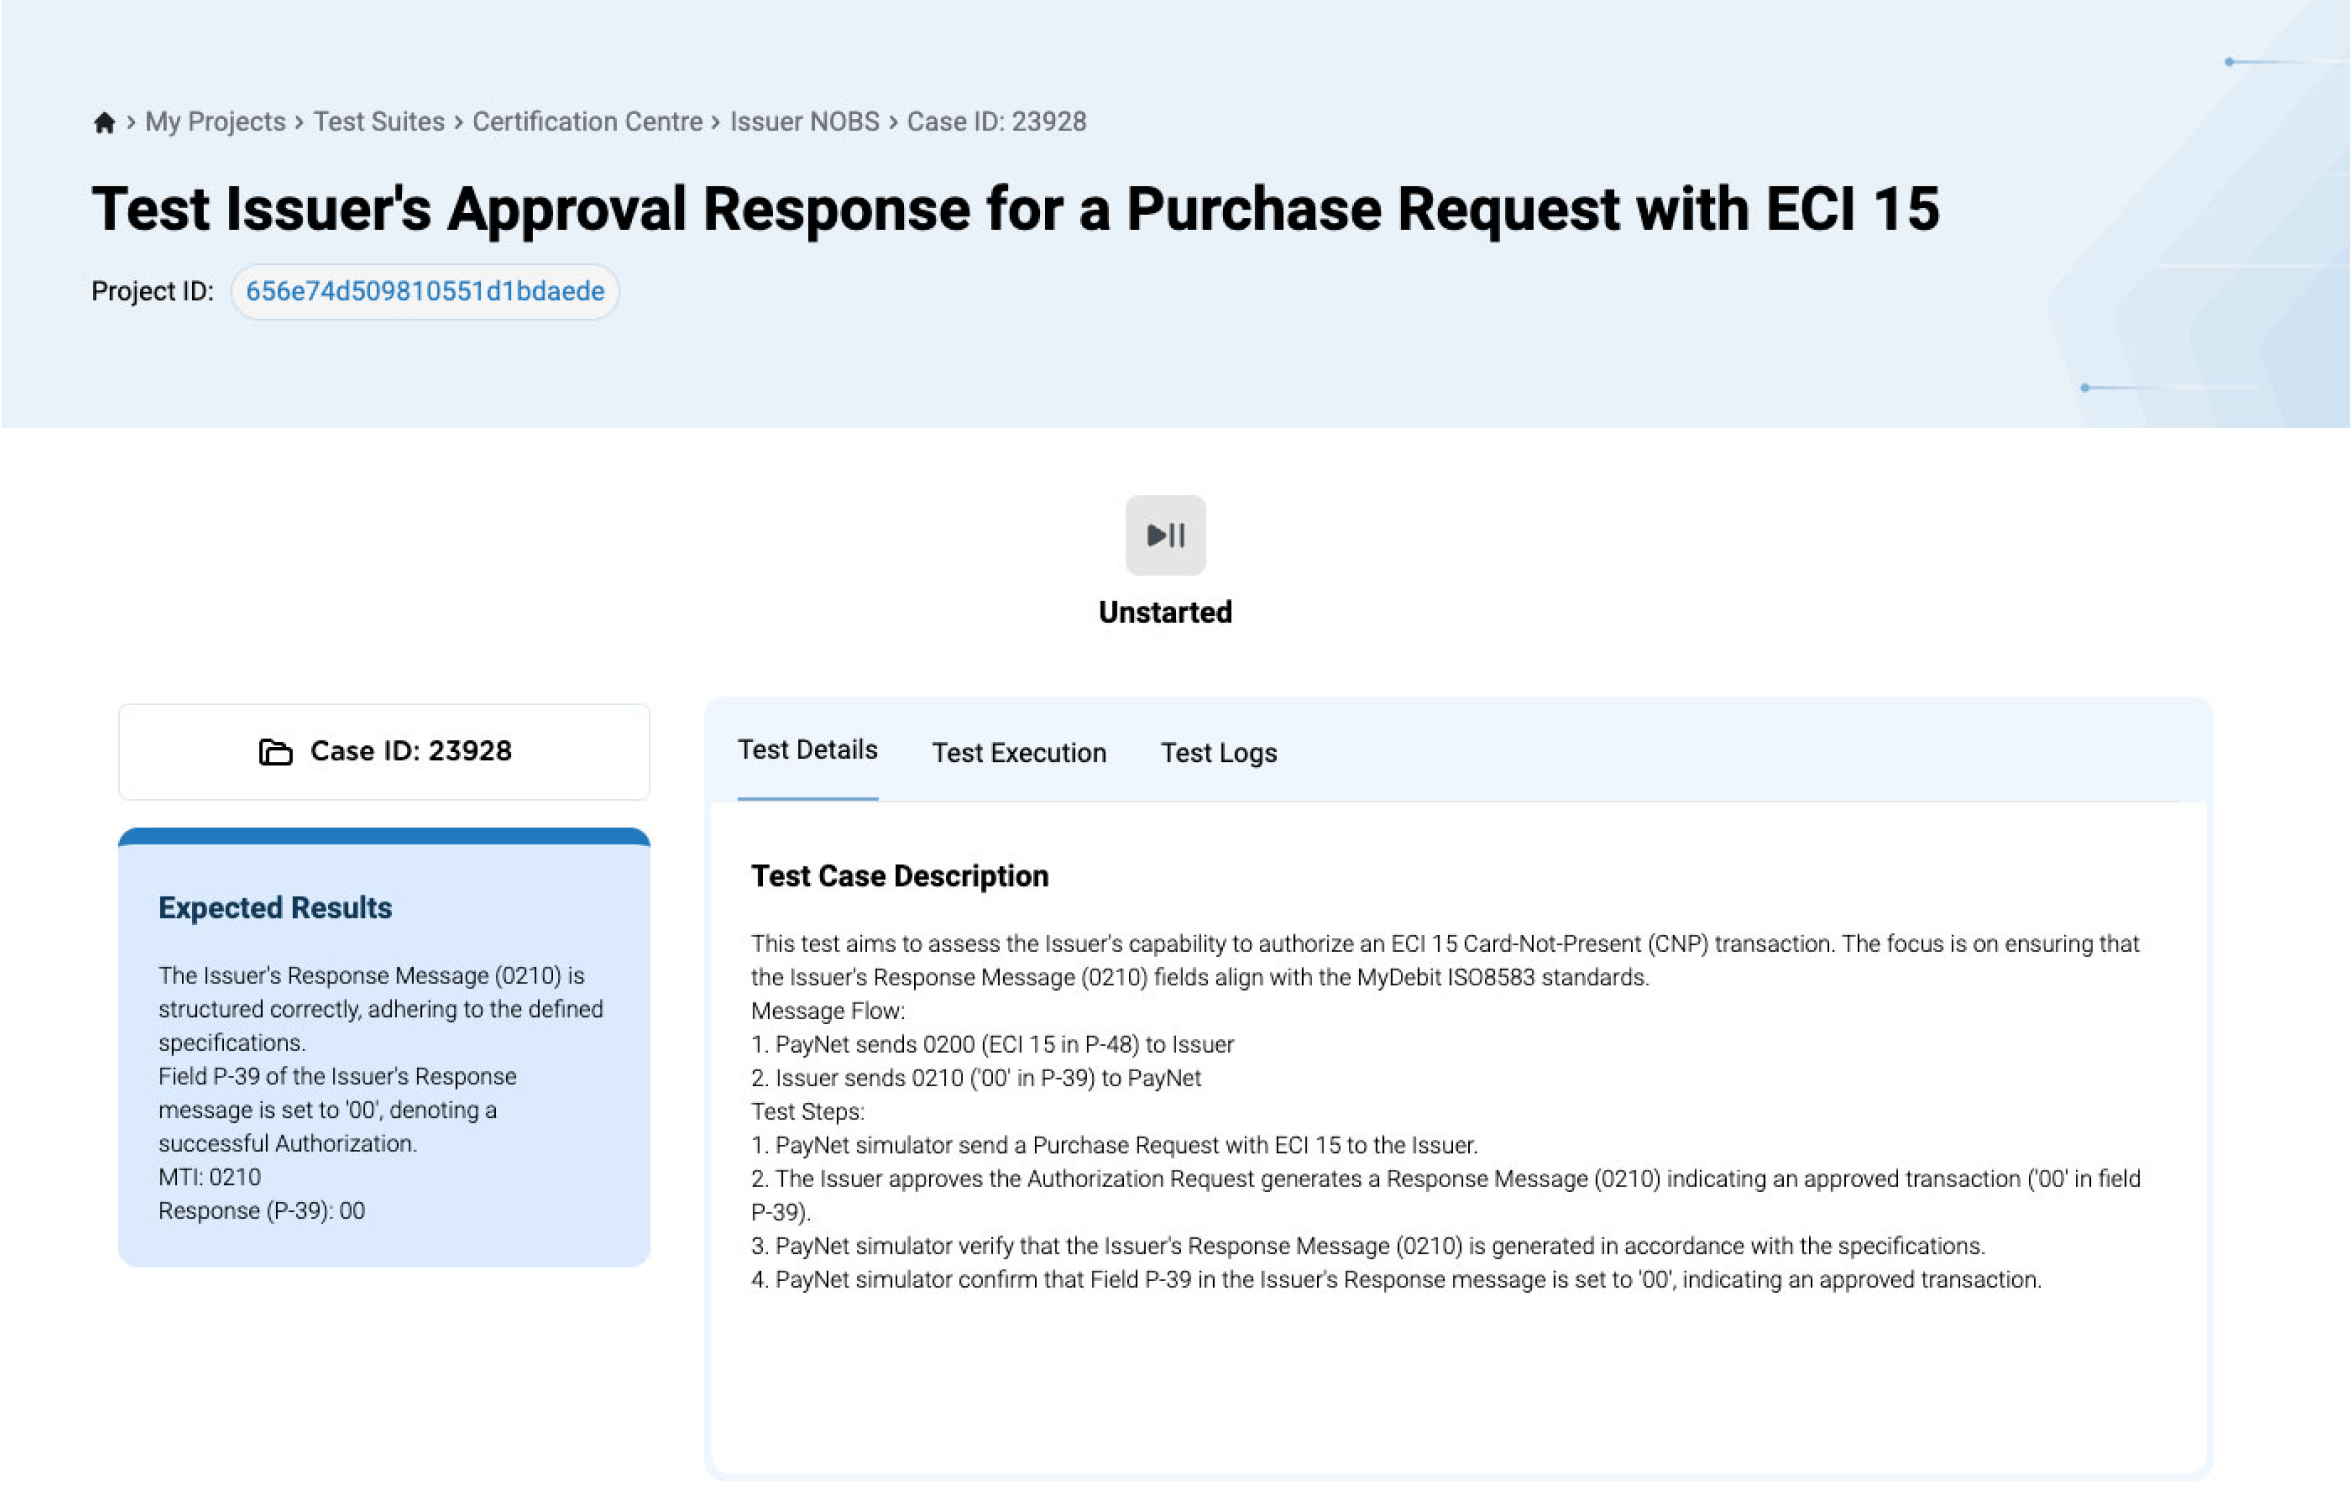
Step 2.3b: Alternatively, you can view it in a full-page mode by clicking on the title of the test case.

The details of the selected test case will be displayed. You can view the test case description, expected results, and initiate to execute this test case within this page.
Step 3: You must complete all the test cases in System Verification in order to proceed to go live.