We've Launched a New Documentation Website (Beta Launch)
The documentation for DuitNow is now available on our newly launched documentation platform. This is an initial beta rollout of our new documentation site, designed to become the long-term home for all documentation moving forward.
You'll find the familiar content you're used to—now hosted on a new platform that will progressively receive updates and enhancements.
We encourage you to start accessing DuitNow materials there to explore the new experience and ensure you're viewing the latest documentation updates. If you have any feedback, please reach out to us.
Visit the New Documentation WebsiteProject Guide - System Verification
Continue with the Project Guide - Certification Centre. This section explains how to proceed to the next stage after completing your Certification Centre test cases.
Watch the video demo to learn Project Guide - System Verification Access Request
Project user journey
Once you complete the Certification Centre test cases, the next stage — System Verification — will be unlocked.
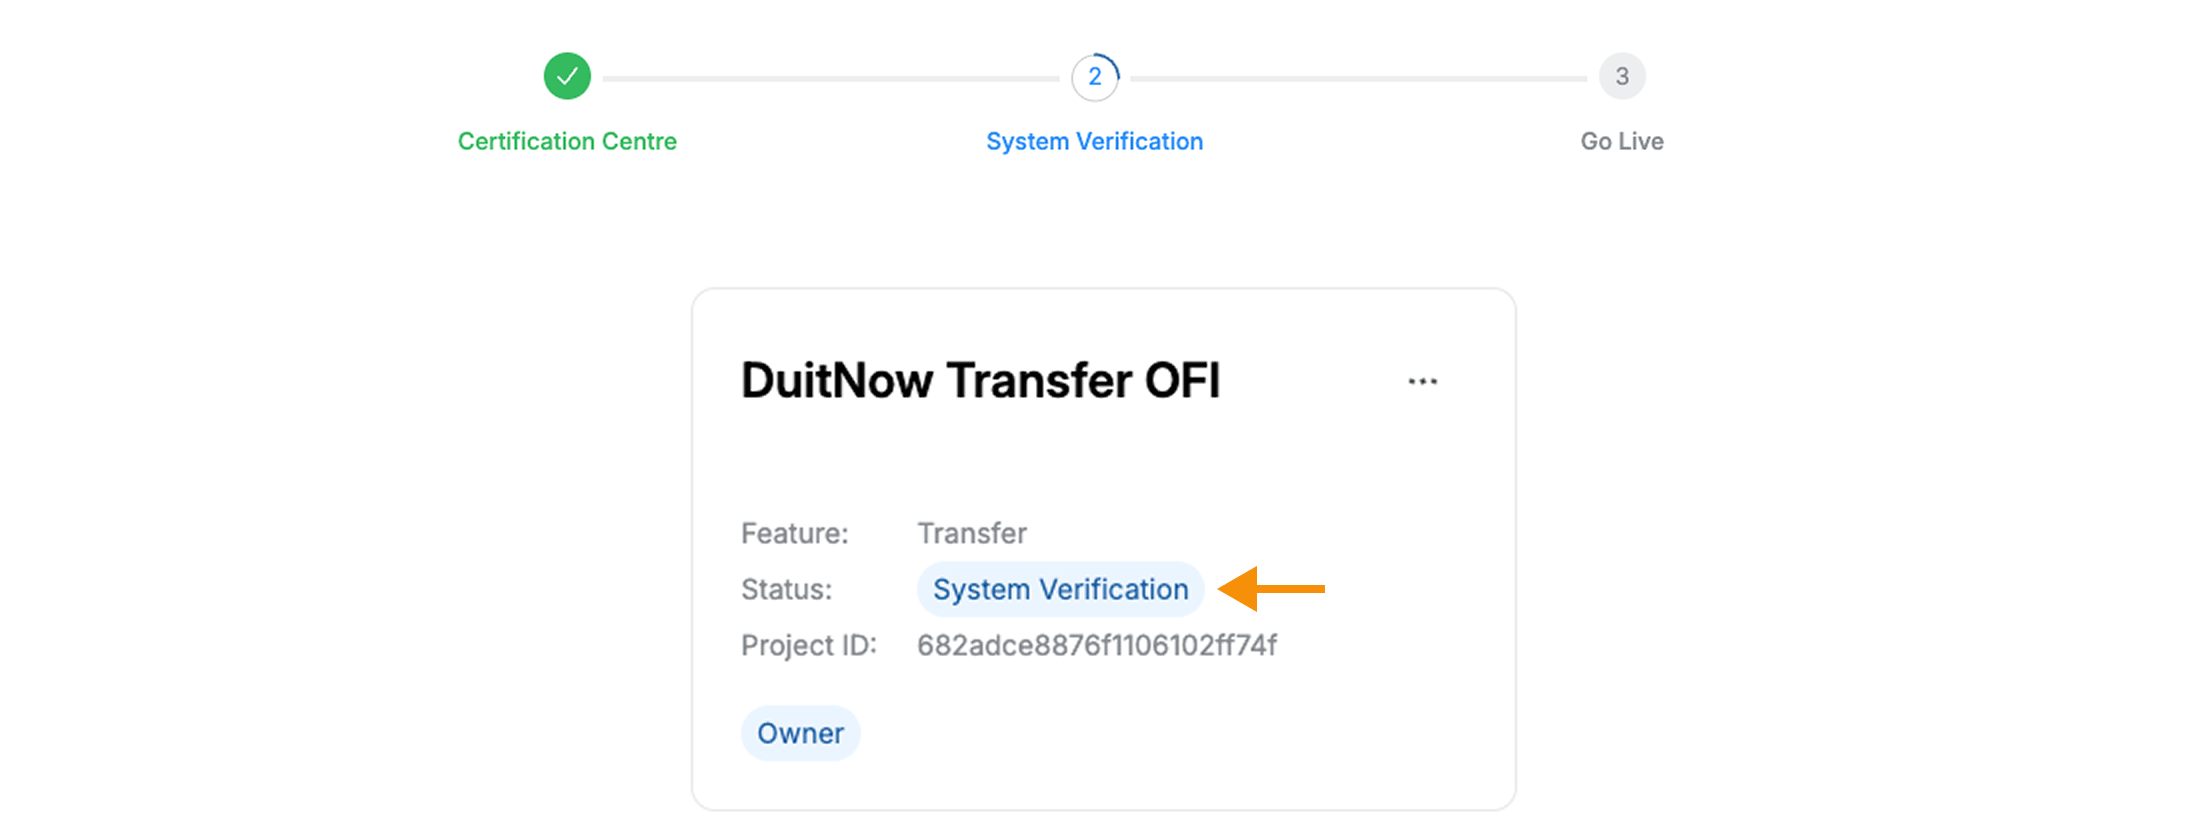
Certification Centre - Certified
Completion ID & Letter
The PayNet Developer Portal will automatically generate a Completion ID and letter. You can view the ID and use the Download button, as shown in the example below.

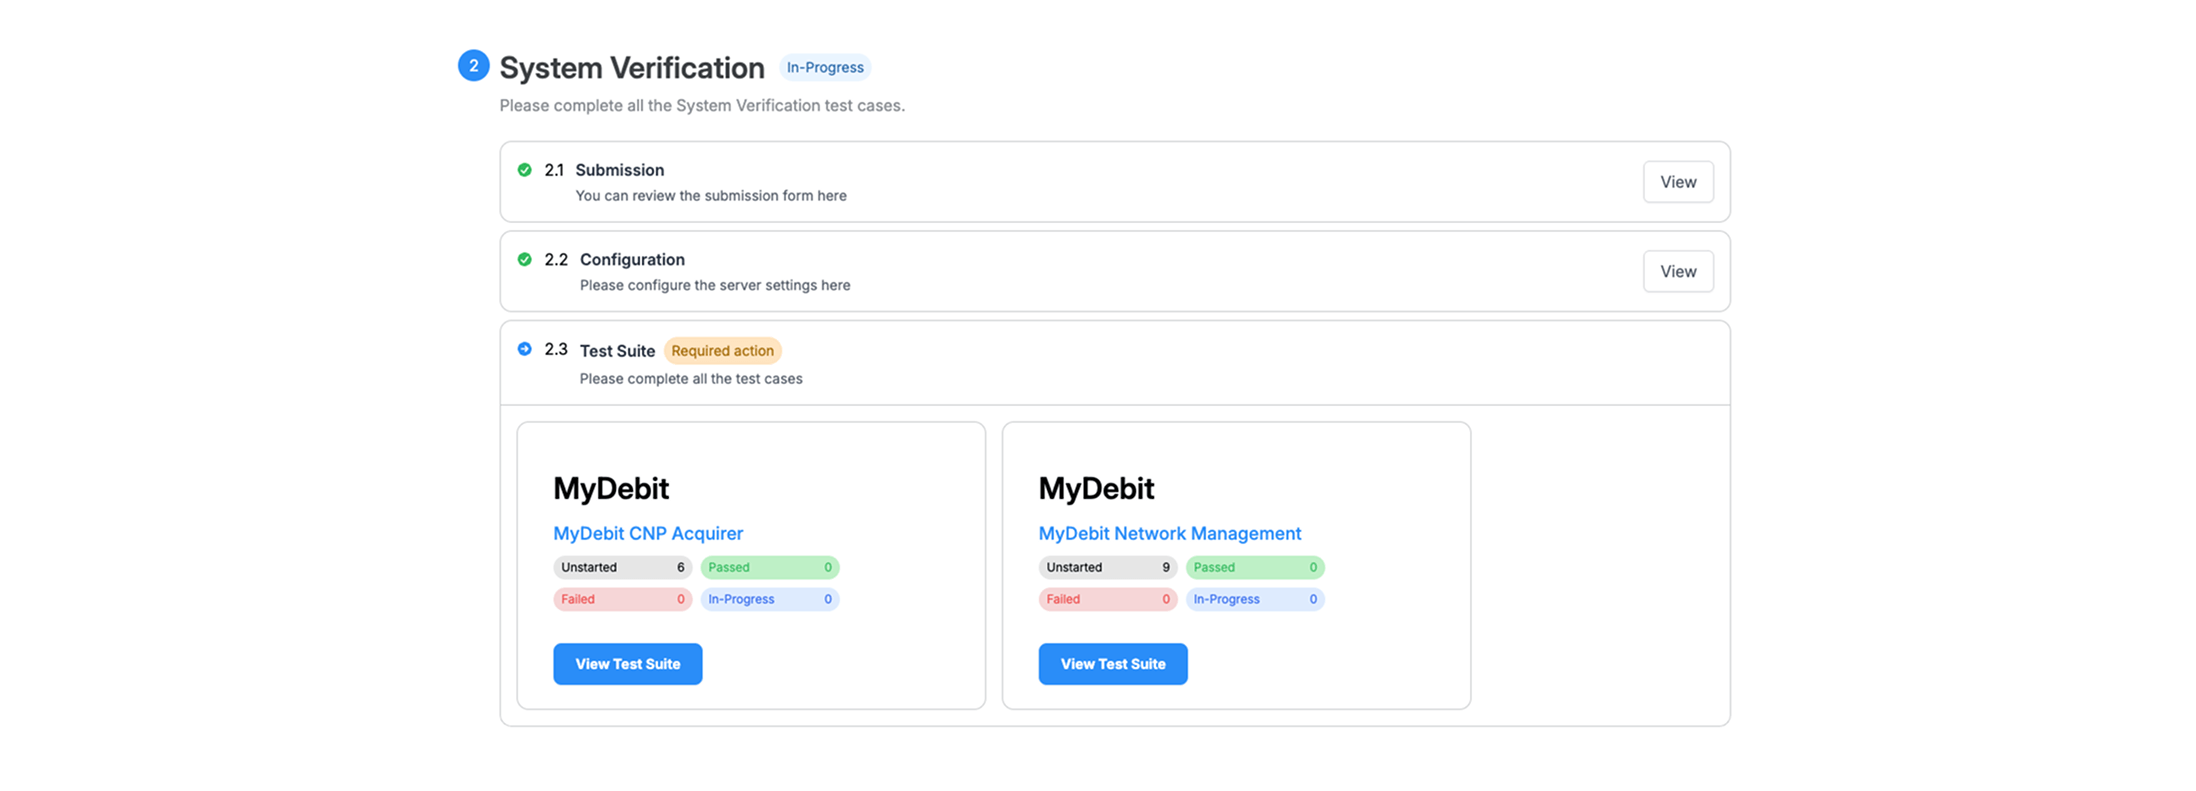
Request Access System Verification
Scroll down to the System Verification section, click the ‘Request Access” to continue.

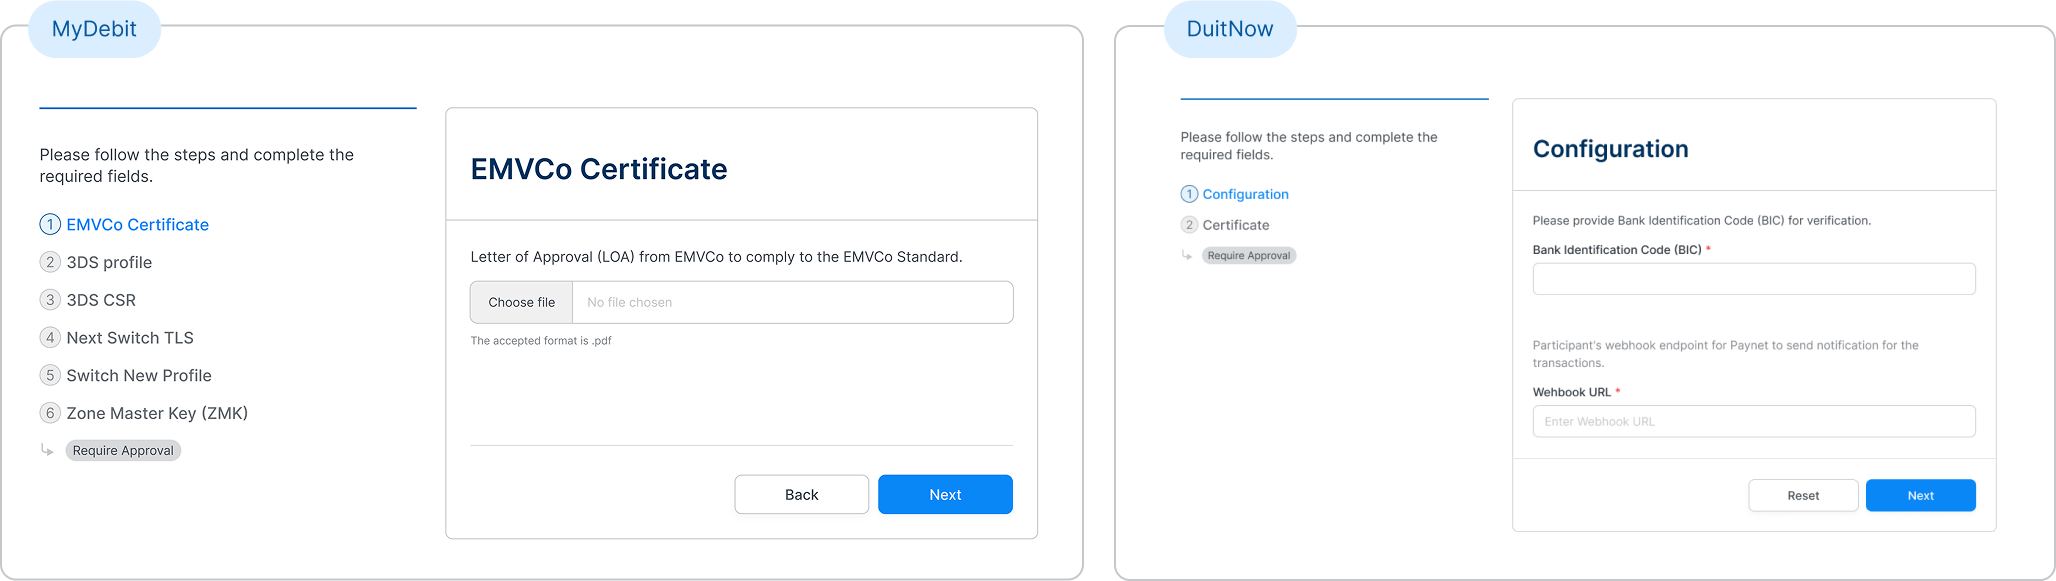
Access Form
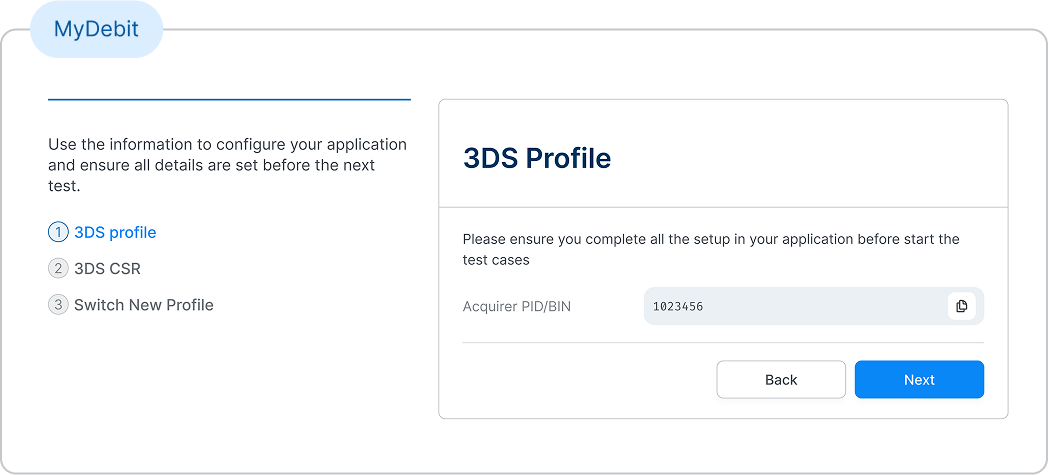
In this step, PayNet require participant to provide the information to for connectivity, certificate, profile setup..etc. this is depending the product and feature setup. Below is the example MyDebit left and DuitNow right. No worries, if you have any enquiries, please reach out to our Support team.
Once submission completed, The PayNet support will now process your configuration request. This process typically takes around 3 working days. No worries, you’ll receive a notification once the configuration and validation are complete.

Start your UAT connectivity configuration
For DuitNow products, you may not need to complete any configuration steps — this depends on your product requirements.
For other products, review the configuration details provided by PayNet, complete the setup, and your Test Suite will be unlocked.
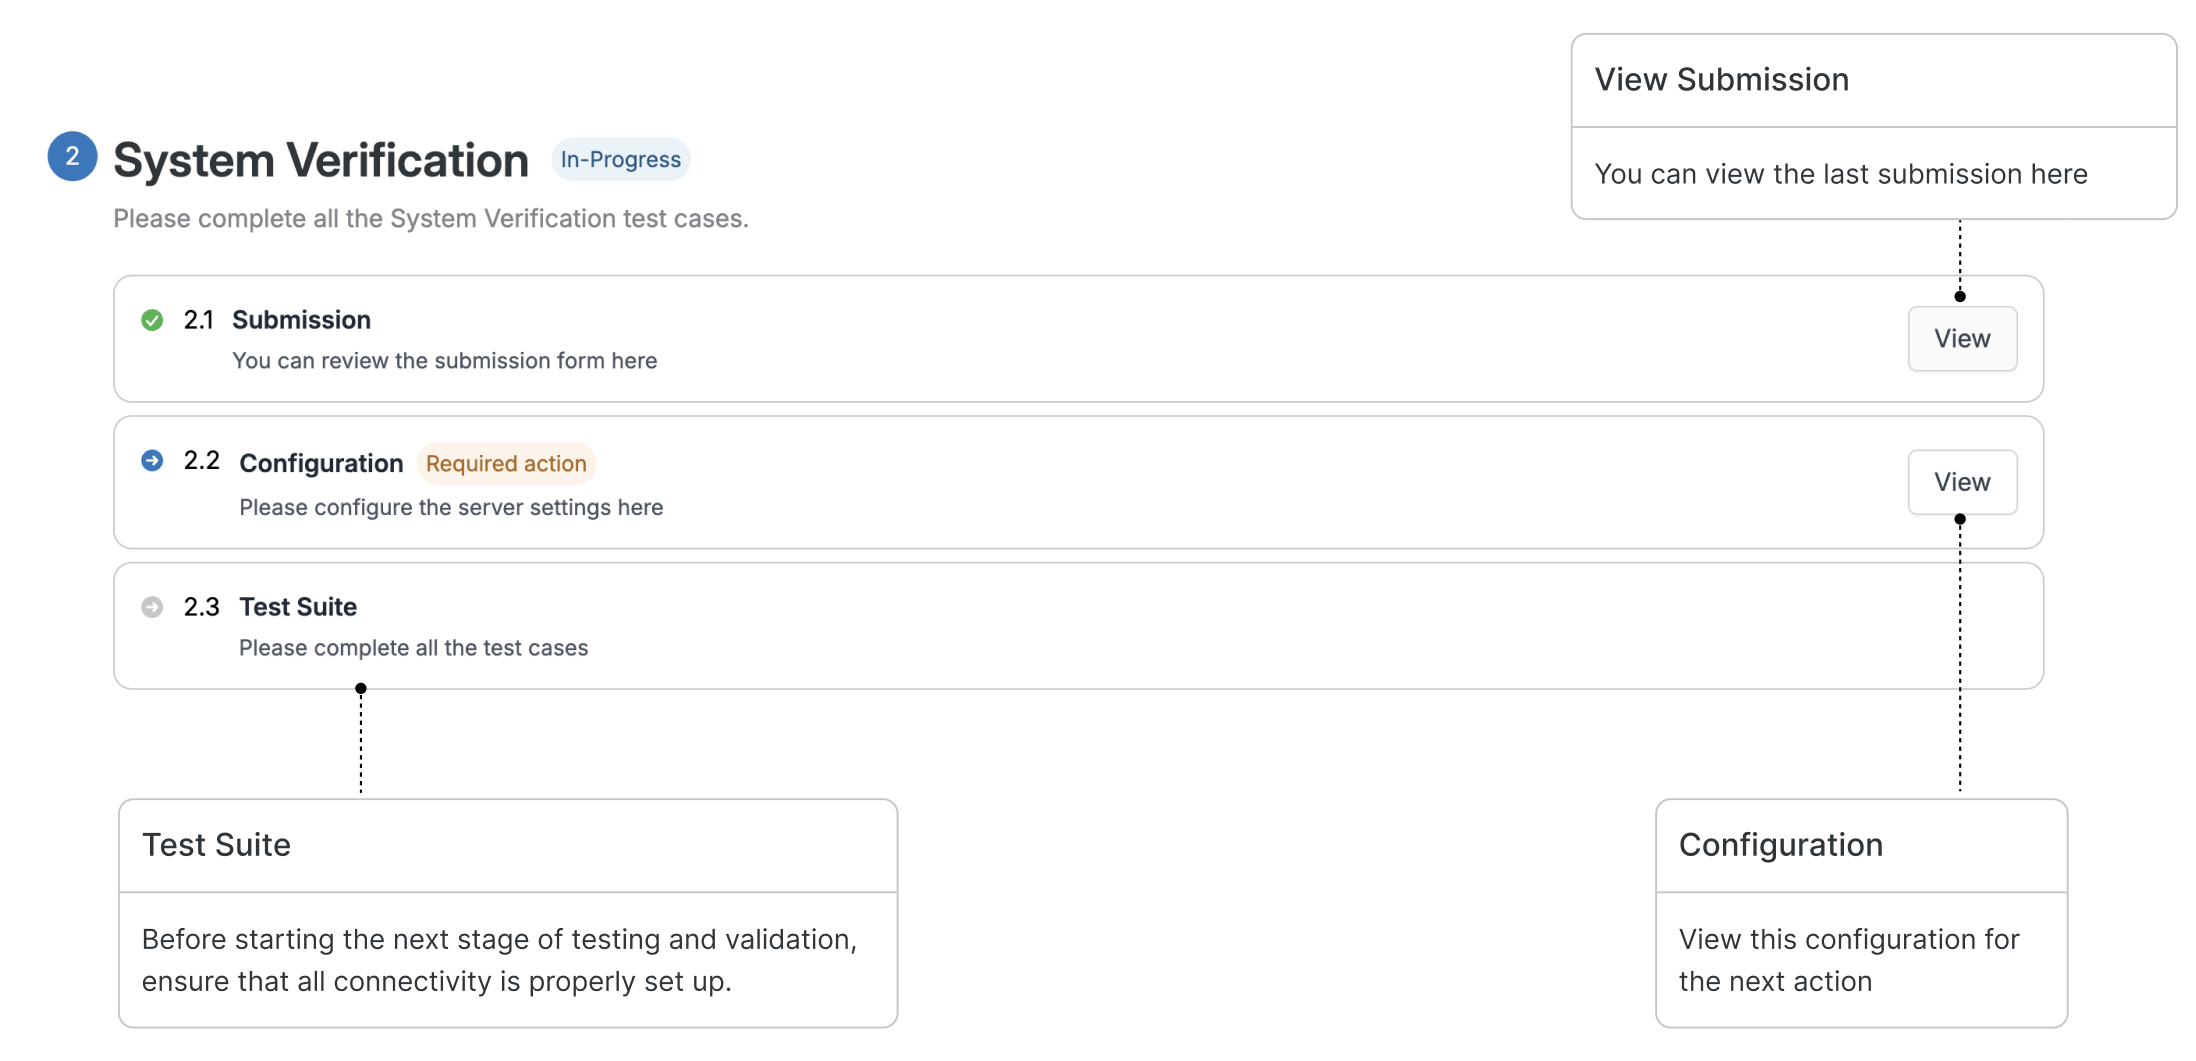
Configuration
Here are the configuration details you need to set up on your server or application. Follow the instructions, complete the setup, and click Done to proceed to the next step. Below is one of the example screenshot from MyDebit.
Begin your System Verification Test Suite
The Test Suite is now ready to access, you can start the testing and validation now.