We've Launched a New Documentation Website (Beta Launch)
The documentation for DuitNow is now available on our newly launched documentation platform. This is an initial beta rollout of our new documentation site, designed to become the long-term home for all documentation moving forward.
You'll find the familiar content you're used to—now hosted on a new platform that will progressively receive updates and enhancements.
We encourage you to start accessing DuitNow materials there to explore the new experience and ensure you're viewing the latest documentation updates. If you have any feedback, please reach out to us.
Visit the New Documentation WebsiteIBFT 1 – Acquirer
This guide provides step-by-step instructions for Acquirer institutions to test IBFT1 (Interbank Fund Transfer Scenario 1) transactions using your own terminals and the Developer Portal.
IBFT1 simulates instant transfer scenarios where customers transfer funds to another bank via the SAN network infrastructure.
Who should use this: Banks, Non-Banks, TPA operating ATM networks acting as ATM Acquirer
Prerequisites
| Item | Provider |
|---|---|
| Your Own Terminal / ATM | Your Organization |
| Test Card (Issuing Card) | PayNet |
| Beneficiary Account Number | PayNet |
| Developer Portal Access | PayNet |
| FIID | Your Organization |
Step 1: Execute Transaction on Your Terminal
1.1 PayNet-Provided Test Resources
PayNet provides the following for IBFT1 Acquirer testing:
- Issuing Card – Test card for transaction execution
- Beneficiary Account Number – Test account for fund transfer destination
Both the issuing card and beneficiary account number are required to execute IBFT1 transactions.
1.2 Transaction Execution
- Execute Interbank Fund Transfer transactions using your own terminal
- Follow your standard procedures for fund transfer operations
- Use the PayNet-provided issuing card
- Use the PayNet-provided beneficiary account number
- Complete the fund transfer transaction
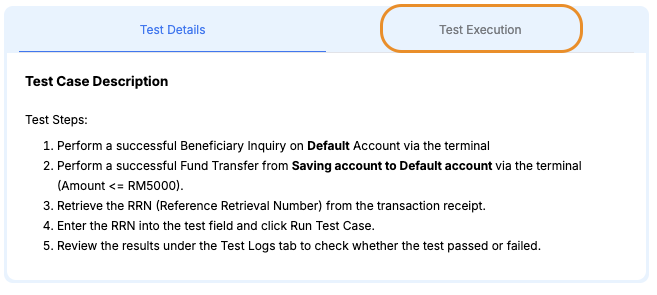
- Beneficiary Inquiry RRN (Step 1) → Obtained from your own system
- Fund Transfer RRN (Step 2) → Obtained from transaction receipt
Step 2: Submit Test Case in Developer Portal
2.1 Navigate to Test Case
- Return to PayNet Developer Portal
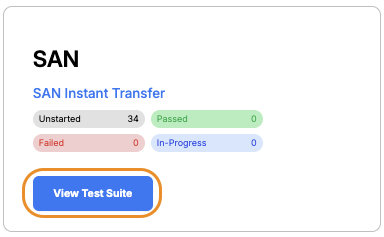
- Open SAN Instant Transfer test suite
- Scroll to Scenario 1 – ACQ
- Click the relevant test case title

2.2 Submit RRN – Multi-Step Execution
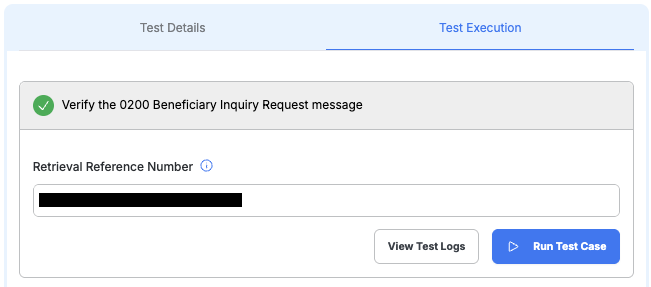
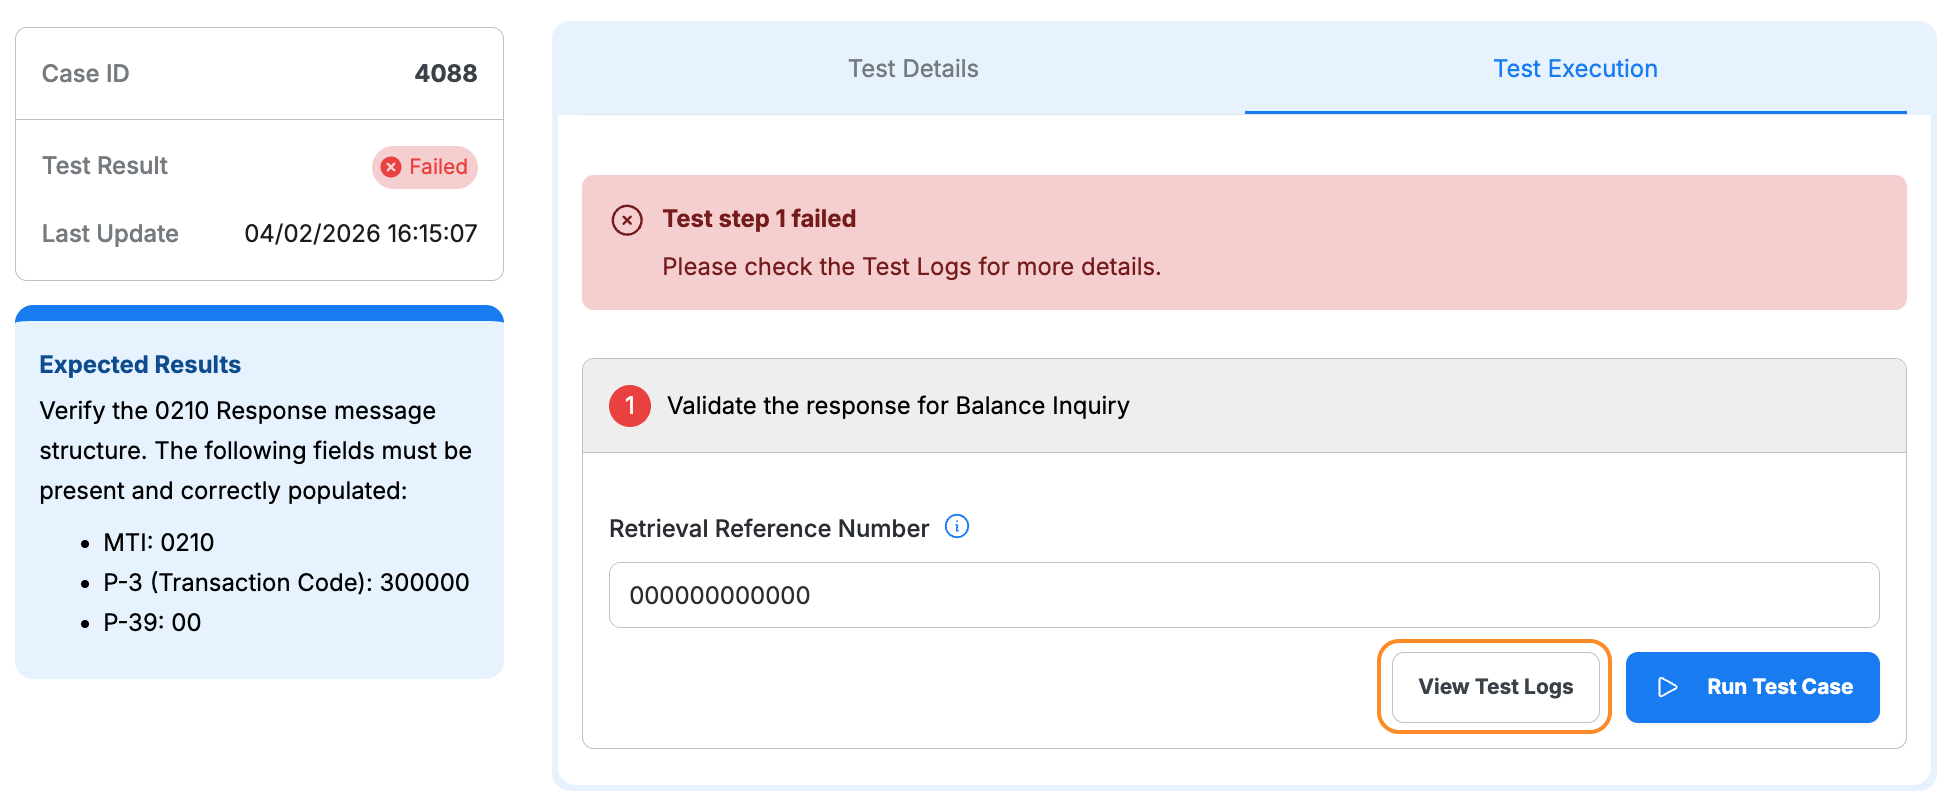
- Click “Test Execution” tab
- You should see 2 steps
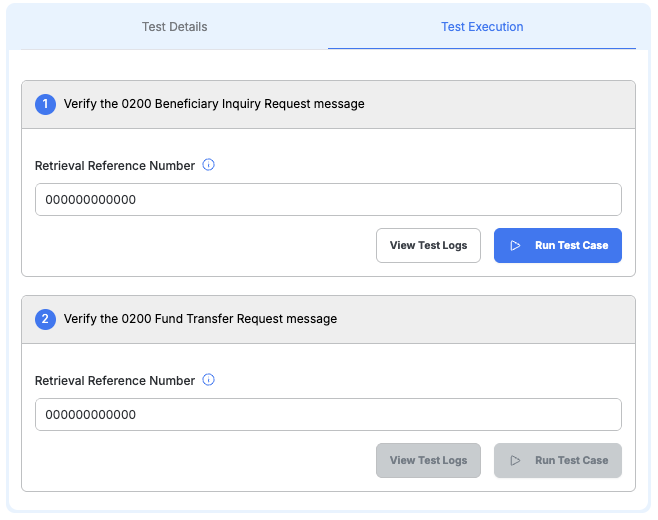
Step 1 – Submit Beneficiary Inquiry RRN
- Enter RRN from your own system in the First Step field
- Click “Run Test Case”
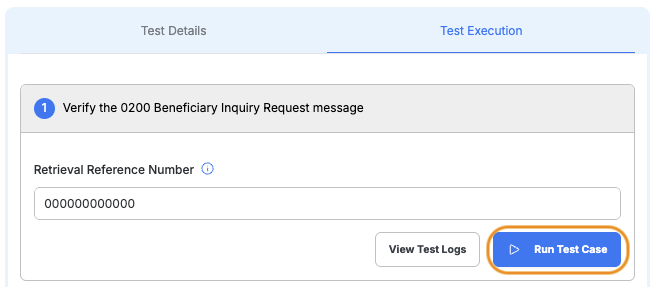
- Wait for validation to complete
You must complete and pass Step 1 first.
Otherwise, Step 2 cannot be executed.
Step 2 – Submit Fund Transfer RRN
- After Step 1 shows “Passed”
- Enter RRN from terminal receipt in the Second Step field
- Click “Run Test Case”
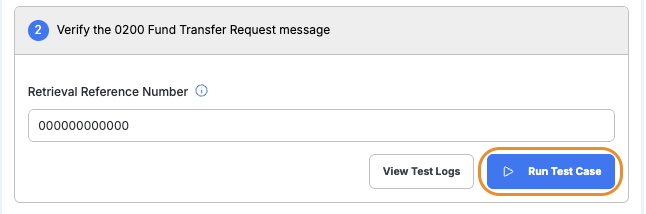
- Wait for validation to complete
This is a multi-step validation.
Step 2 is only enabled after Step 1 passes successfully.
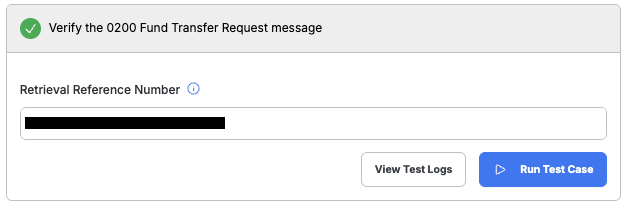
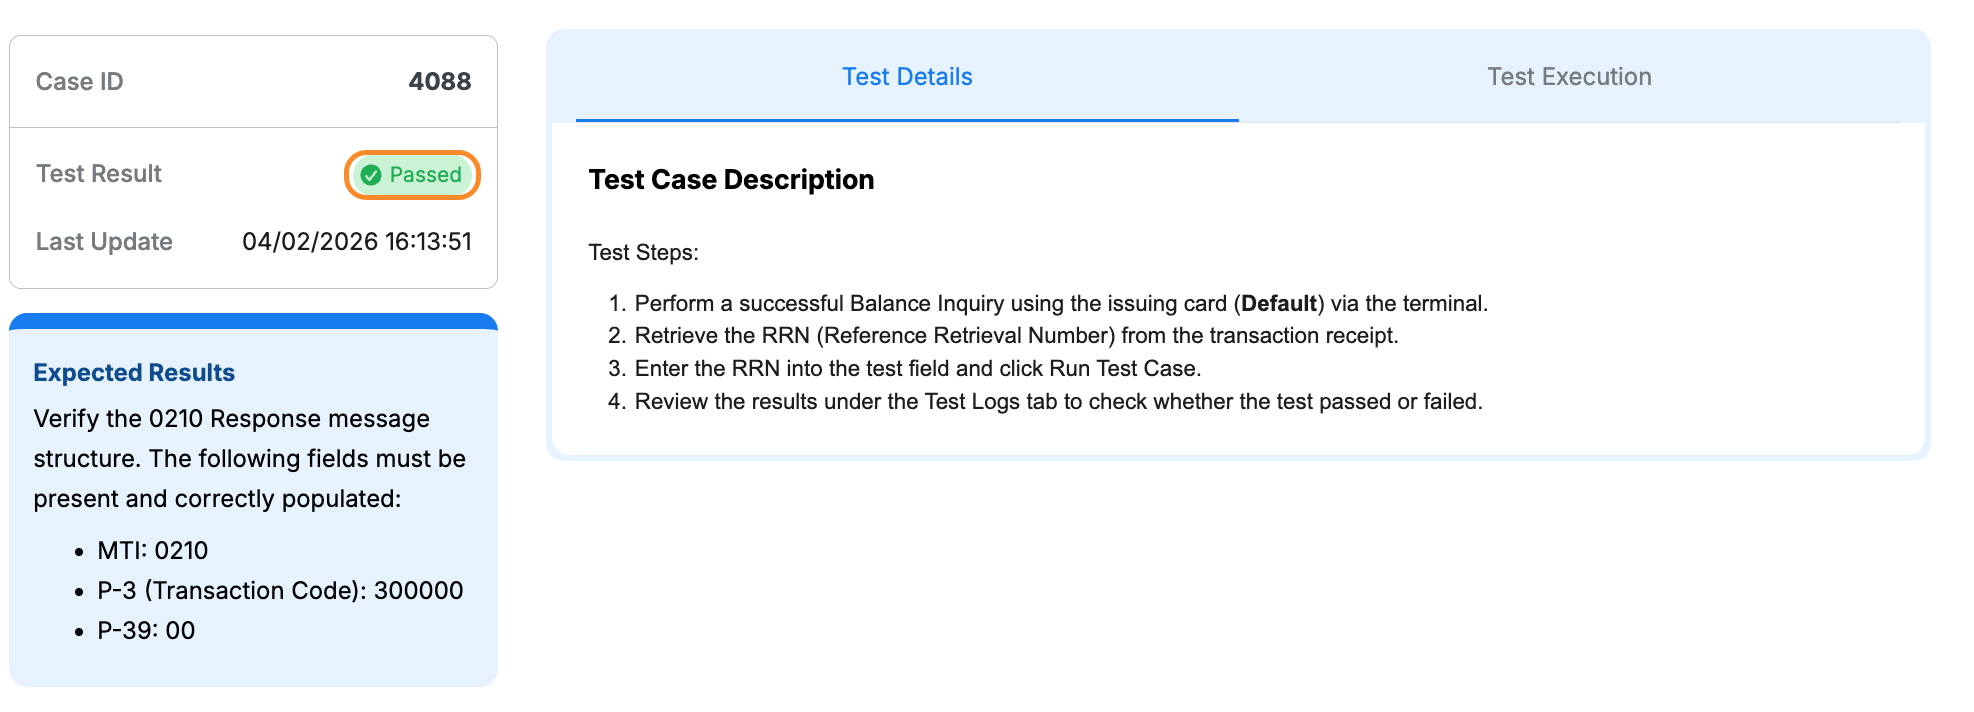
2.3 Review Results
- Passed: Status badge displays a green Passed label
- Failed: Click View Test Logs to identify the issue and error details
Step 3: Complete All Test Cases
Completion Checklist
- Repeat Steps 1–2 for each test case in Scenario 1 – ACQ
- Complete all account type combinations
- Complete all amount ranges specified in test cases
- Ensure all test cases show “Passed”
- Review test logs for any failures