We've Launched a New Documentation Website (Beta Launch)
The documentation for DuitNow is now available on our newly launched documentation platform. This is an initial beta rollout of our new documentation site, designed to become the long-term home for all documentation moving forward.
You'll find the familiar content you're used to—now hosted on a new platform that will progressively receive updates and enhancements.
We encourage you to start accessing DuitNow materials there to explore the new experience and ensure you're viewing the latest documentation updates. If you have any feedback, please reach out to us.
Visit the New Documentation WebsiteApply Centralised Certificate in Project
Continue with the Centralised Certificate. This is the guide on how to apply Centralised Certificate in project.
Watch the video demo to learn how to apply Centralised Certificate in project.
Overview
Discover the lifecycle of your company’s shared certificates — from setup to renewal.
You are now at Step 2: Apply Centralised Certificate in project.

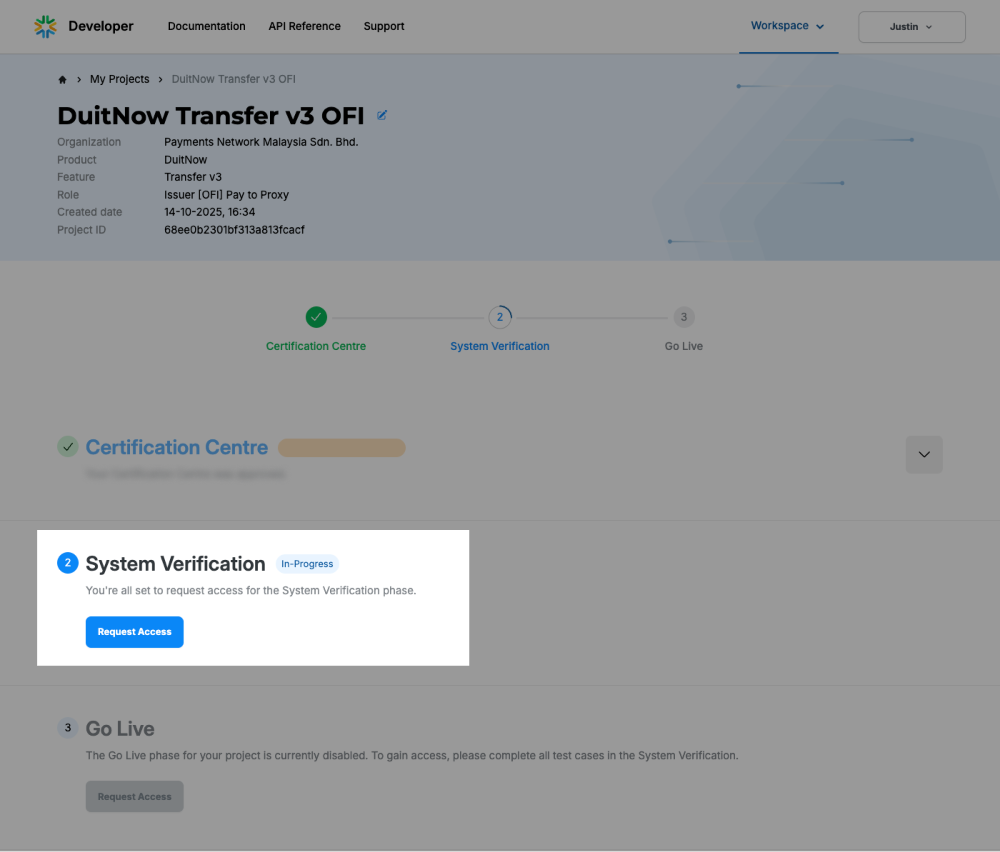
1. System Verification Access Requests
Once you’ve completed the Certificate Centre test cases, you’ll unlock access to the System Verification Request.
Click “Request Access” to begin.
2. System Verification request
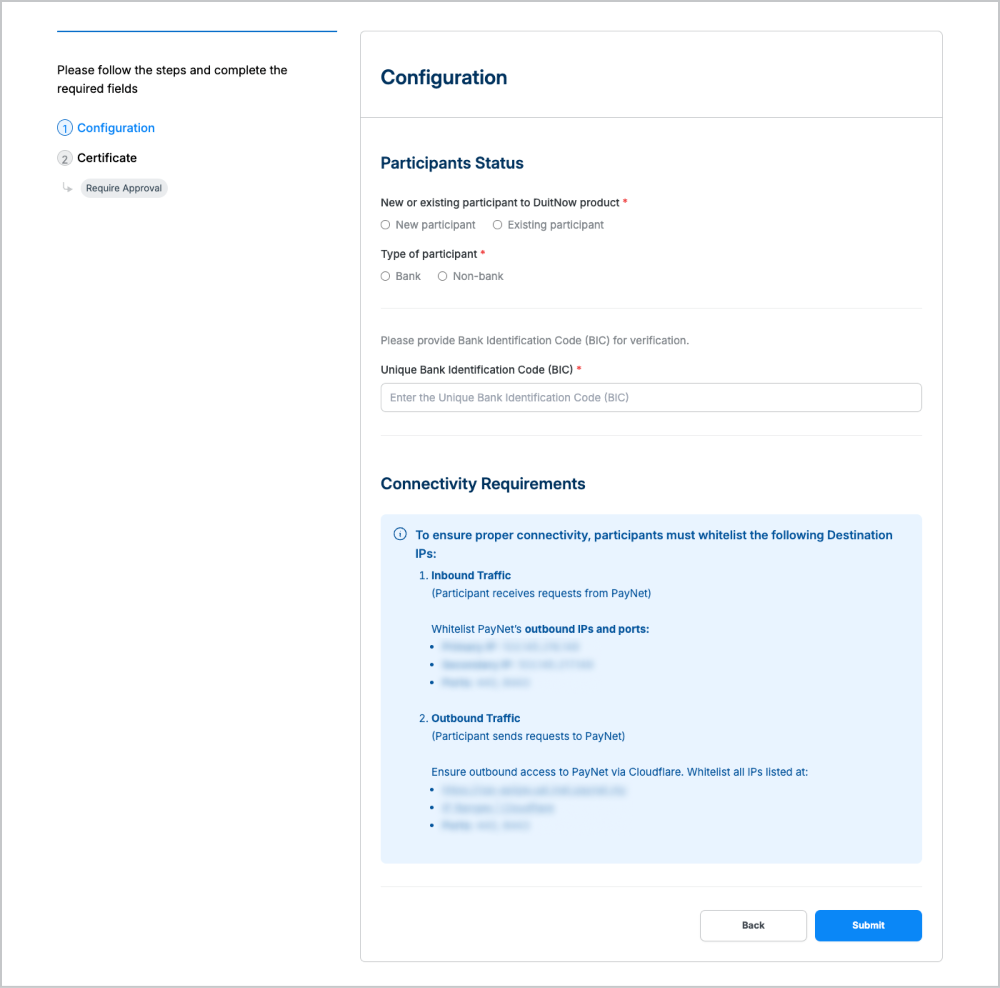
2.1 Configuration
For DuitNow V3, you’ll need to provide the System Verification (UAT) configuration details.
Fill in all the required fields according to your application’s connectivity setup, then click “Submit” to continue to the next step — 2.2. Certificate.
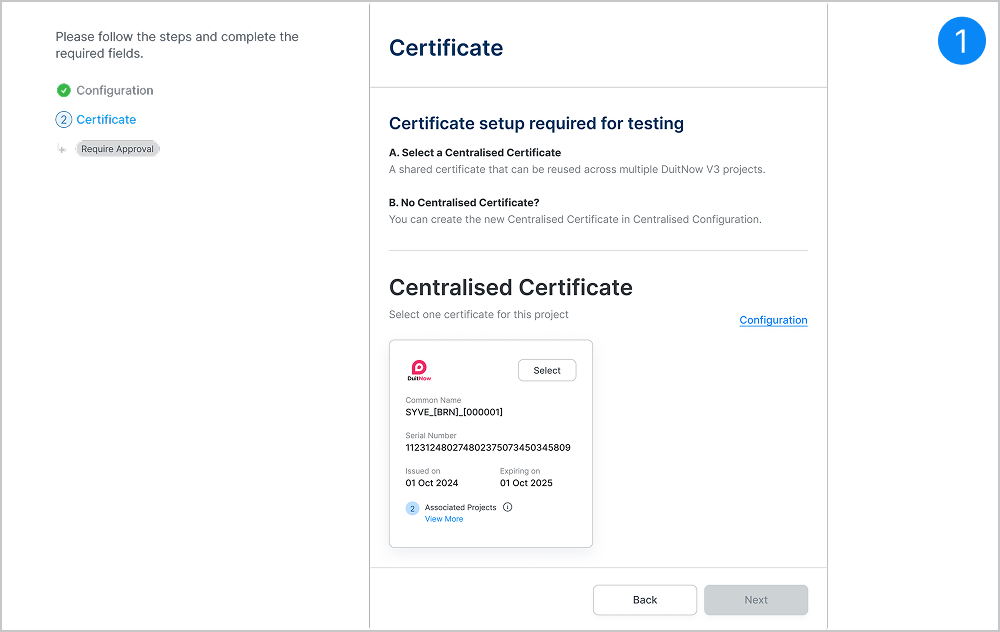
2.2 Certificate
Centralised Certificate - PayNet-signed
In the Centralised Certificate guide, we showed how to add a certificate in the configuration section. You can now see one available certificate ready for selection.
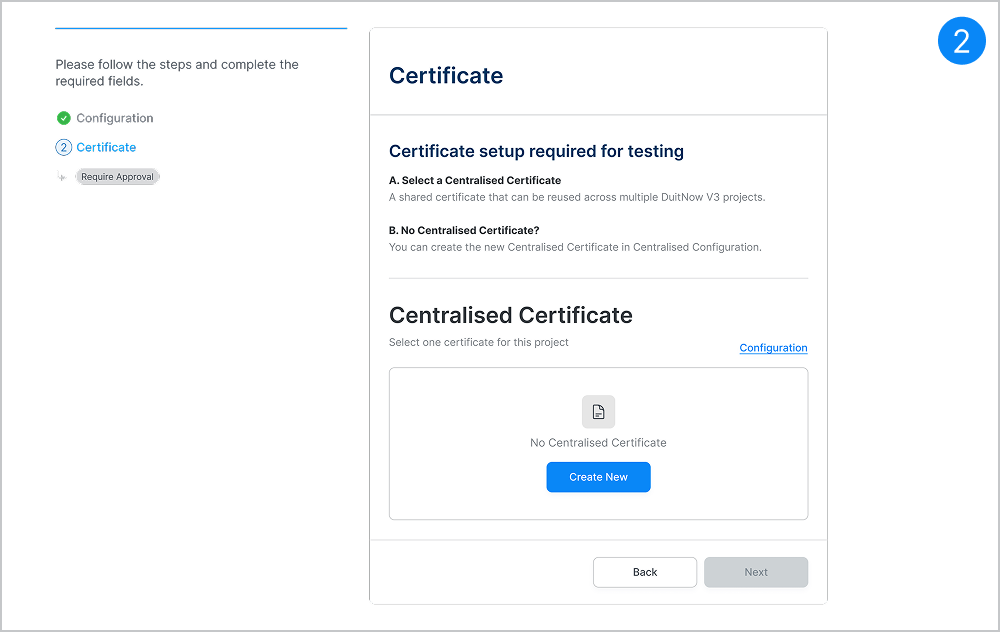
If you haven’t create the Centralised Certificate, click the “Create New” from the Configuration page.
Review the certificate details carefully — here you’ll see information such as the common name, expiry date and the associated projects currently using the same certificate.
Once confirmed, click “Select” and then “Submit” to proceed.
The selected certificate will now be used for your System Verification testing.
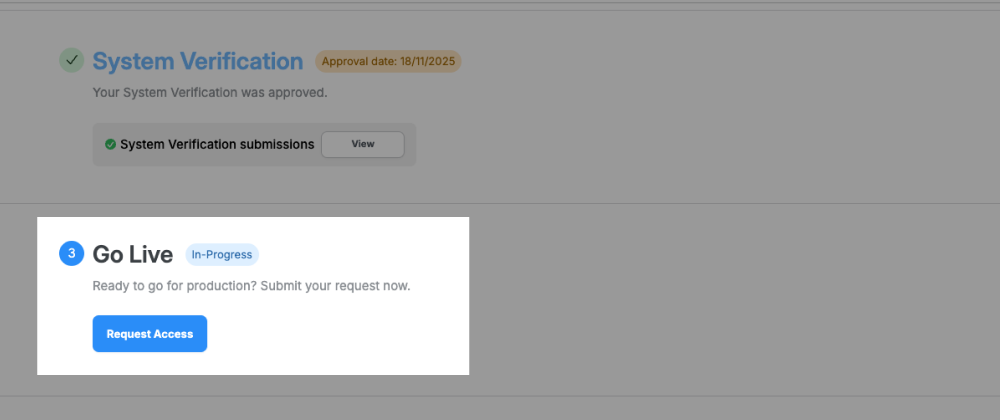
3. Go-Live Access Requests
Once you’ve completed the System verification test cases, you’ll unlock access to the Go Live Request.
Click “Request Access” to begin.
4. Go live Request
4.1 Configuration
For DuitNow V3, you’ll need to provide the Go Live (Production) configuration details.
Fill in all the required fields according to your application’s connectivity setup, then click “Submit” to continue to the next step — 4.2. Certificate.

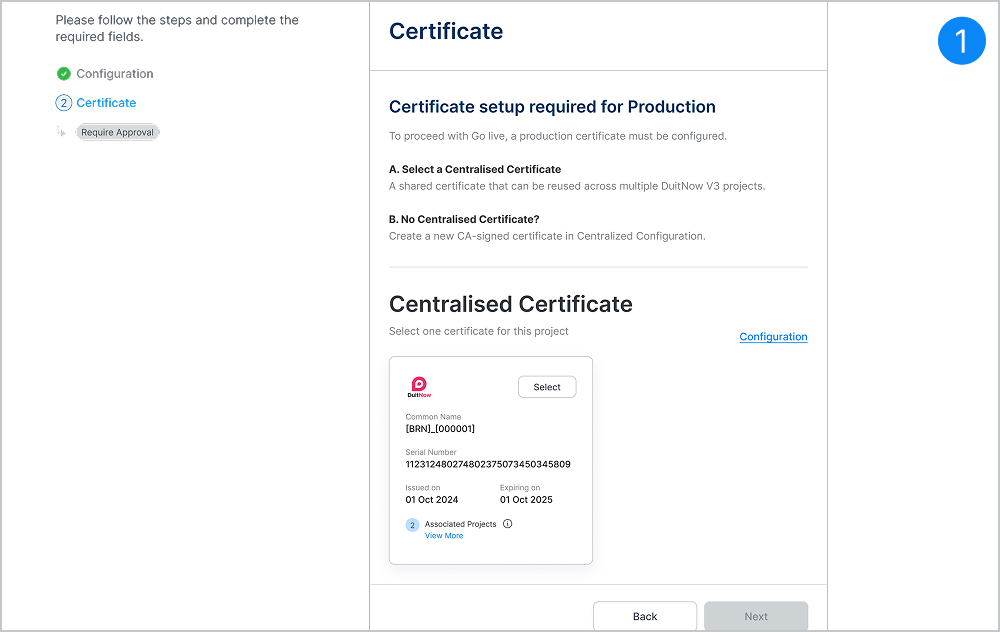
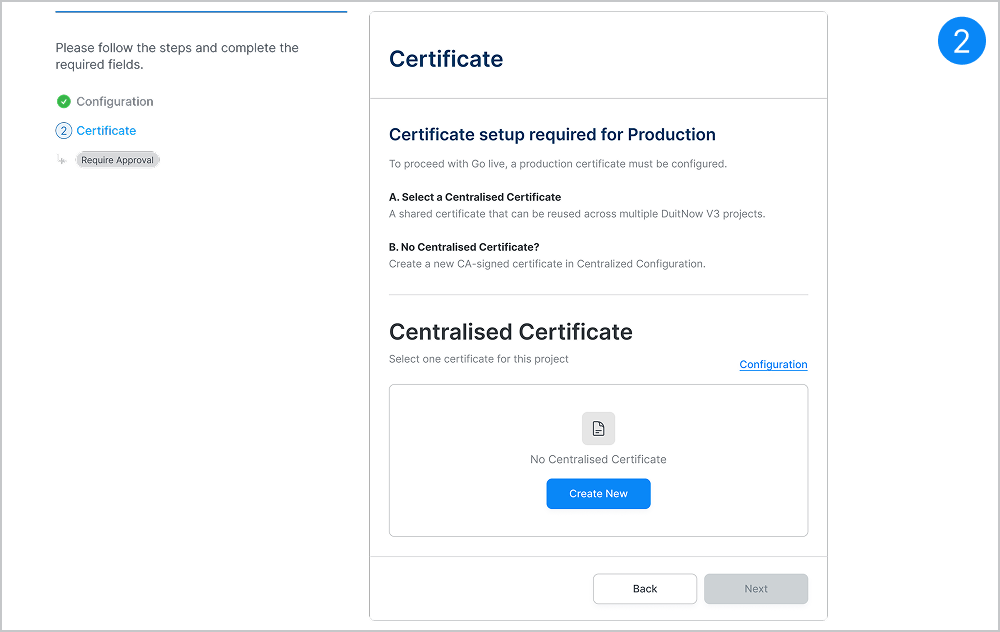
4.2 Certificate
Centralised Certificate - Authorised CA-signed
In the Centralised Certificate guide, we showed how to add a certificate in the configuration section. You can now see one available certificate ready for selection.
If you haven’t create the Centralised Certificate, click the “Create New” from the Configuration page.
Review the certificate details carefully — here you’ll see information such as the common name, expiry date and the associated projects currently using the same certificate.
Once confirmed, click “Select” and then “Submit” to proceed.
The selected certificate will now be used for your Production.
Next Step – Centralised Certificate renewal
In this step, you’ll learn how to manage and renew centralised certificate in Certificate Management Platform.
Learn More